How to set up & install your Dymo LabelWriter Printer
- Aug 31, 2016
So you just received your Dymo printer but you're not sure how to set it up? You're in the right place.
Here are some steps on how to set up and install your Dymo LabelWriter Printer.
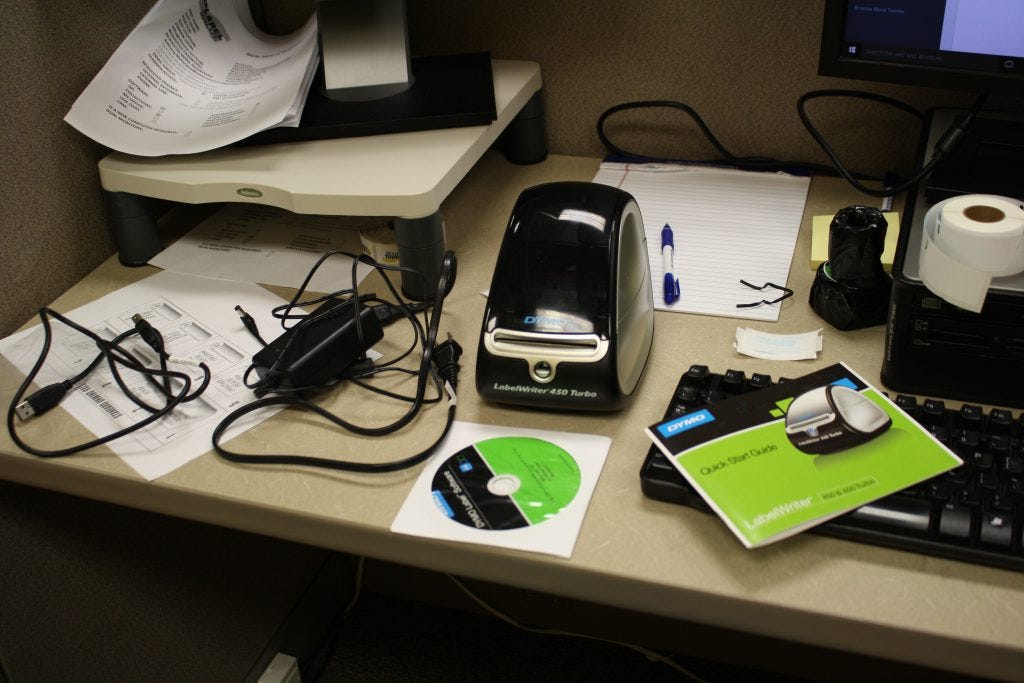
Step 1: Open up the DYMO box.
Make sure you have all your materials: LabelWriter printer, USB cable, CD-ROM, cleaning card, roll of DYMO Stamps labels, roll of address labels, quick start guide, power adapter, and power cord.
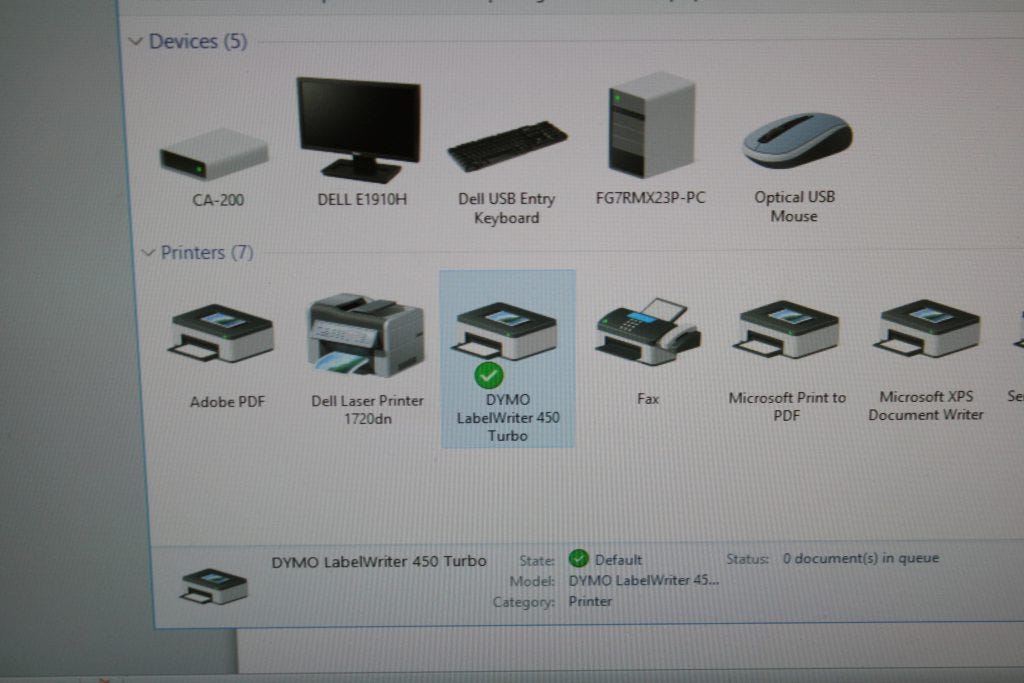
Step 2: Install the software
To install the software on a Windows system:
1. Close all open Microsoft Office applications.
2. Insert the DYMO LabelWriter CD into your DVD drive.
After a few seconds, the installation screen appears.
3. Click Install and follow the instructions in the installer.
To install the software on a Mac OS system:
1. Install the DYMO LabelWriter CD into the DVD drive. After a few seconds, the DYMO Label Installer icon appears.
2. Double-click the Installer icon and follow the instruction.
Step 3: Connect your LabelWriter printer
To connect the power:
1. Plug the power cord into the power adapter.

2. Plug the power adapter into the power connector on the bottom of the printer.

3. Plug the other end of the power cord into a power outlet.
4. Plug the USB cable into the USB port on your computer.

5. Insert the power and USB cables through the cable channel and set the printer down.

6. When the software is completely installed, connect the other end of the USB cable into an available USB port on your computer.
Step 4: Print your labels! (and buy them from LabelValue.com here)!
And now you're all set!
If you're having any other issues connecting, setting up, installing or printing from your Dymo LabelWriter printer, please give our friendly support staff a call at 800-750-7764, Mon-Fri. 8am-6:30pm EST or email us at service@labelvalue.com or chat with us using the "Chat With A Label Expert" button below.
Happy label printing!