WHITE LAYER GUIDE
How To Create A White Ink Layer
Are you printing on a clear or metallic material? If so, you have a lot of flexibility with how to make really neat and unique label designs. But first, you will need to understand how to set up the white layer to get the appearance you want.


How White Ink Works
White ink is the first ink applied on the material, followed by the four-color CMYK process inks that create the rest of the design. This allows you to create what appear to be “knockouts” of areas that are metallic or clear next to areas that appear like a typical white label substrate.
Note: The white layer is a requirement for printing on clear or metallic materials.
How To Add White Layer in Your Art File
-
Step 1: Create The Swatch
In Illustrator, open the color swatch panel and create a new Spot Color called “HPI-White”. This name is unique to our printing equipment. Set it to a color that contrasts the artwork, so you can see it when designing your label.


-
Step 2: Create Your Layers
In addition to the graphics layers you have in your file already, create a layer above all of them called “White”.

Step 3: Create Your Design
Now it's time to create your label design or add it to the art layer(s) if you already have it made. Be sure that any areas that you want to either have white underneath or only show metallic are vector or have vector shapes mirroring them.
Step 4: Create Your White Layer
Decide which areas you want to have white print underneath for a flat appearance. Select only these elements and copy (CTRL + C) & paste in place (CTRL + SHIFT + V) into your White art layer. Set these elements to the white spot color, HPI-White. Then overprint them in Window > Attributes > Overprint (Fill and/or Stroke depend-ing on your design). Note: It’s often best to Expand All objects before changing the fill to HPI-White.
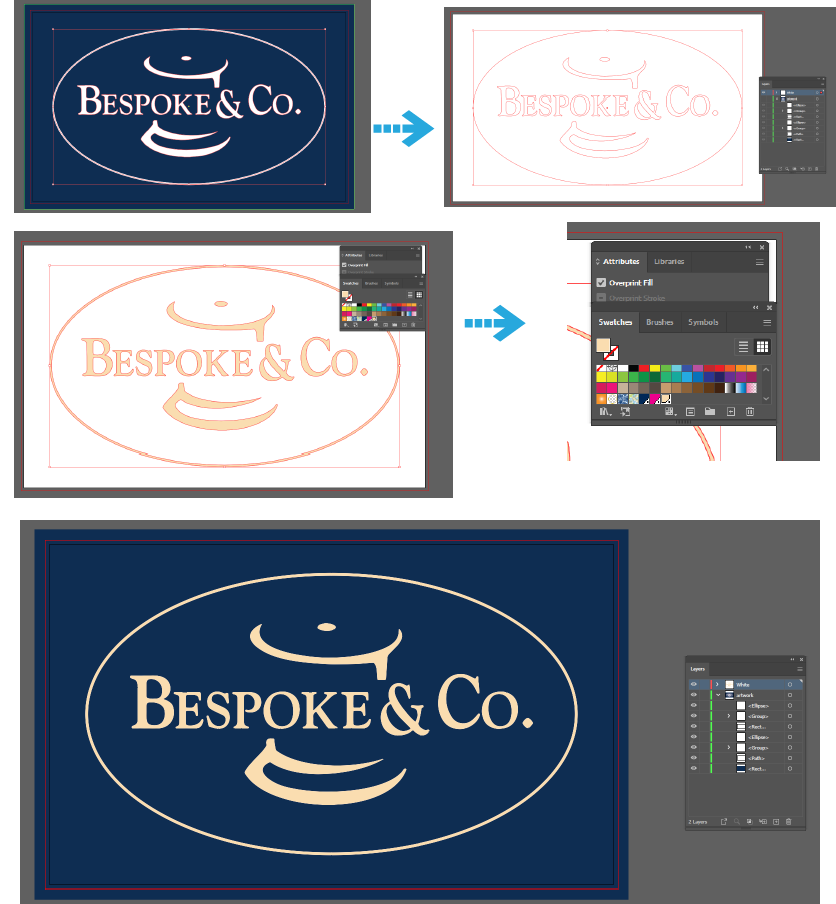
The final image above is an example of a finished label design where the blue will have a metallic sheen, but the logo and oval will print white.
Step 5: Creating Knockouts in the White Layer
If there are elements overlapping, or on top of, the white objects that you want “knocked out” to appear metallic/clear, select these items and copy and past them on top of the white objects in your white layer. Turn off all layers other than white, then select all > pathfinder > minus front. This will knock out these elements from the white layer, allowing them to appear shiny or clear.
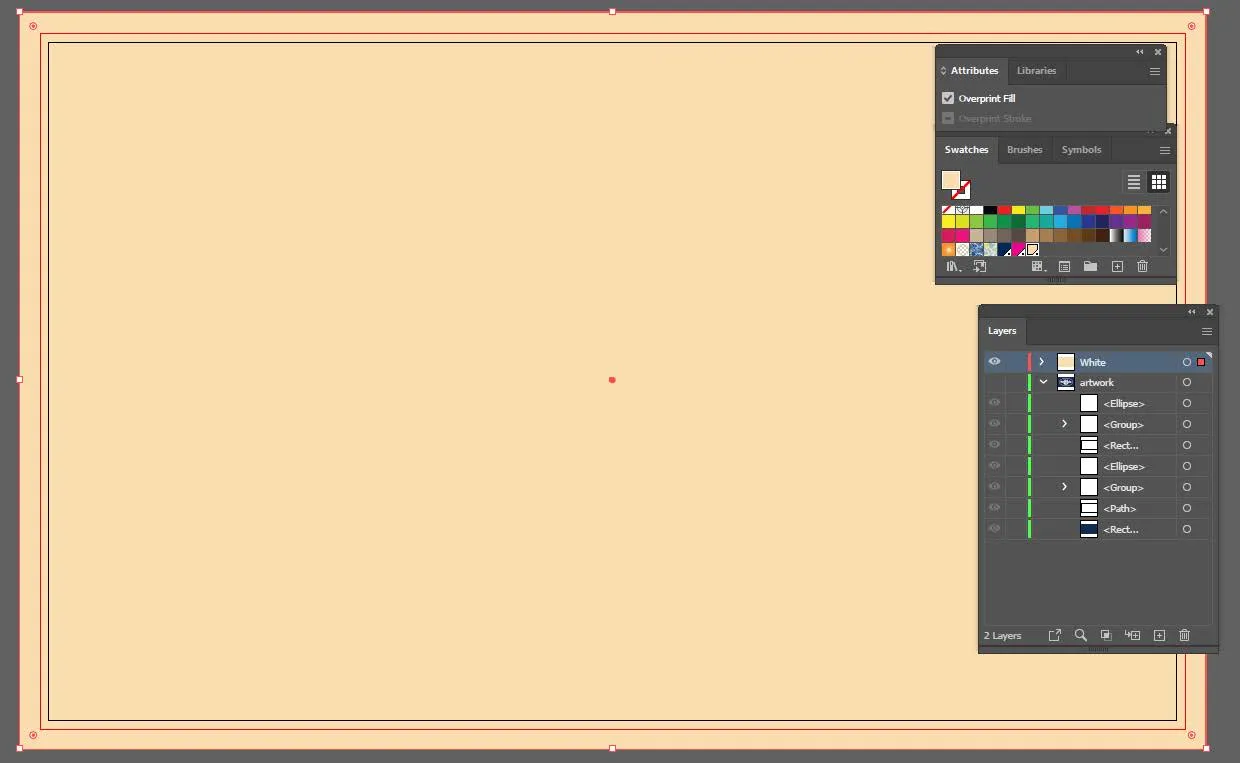
Using the same artwork, if the designer wanted for the blue to print flat, and the white areas to be metallic, we would need to knock the logo out of the white layer. Here is what that would look like using the steps above.
-
First, copy the blue rectangle into the white layer, turn to HPI-White swatch, and set Overprint Fill to on.
-
Next, copy/paste in place the elements to knock out into the white layer, on top of the white object(s). Note: we changed the color to red for demonstration purposes.

-
Finally, turn off your other layers, select all objects on the white layer > pathfinder > minus front. This leaves you with a white layer that will print white under the blue background, while the logo and oval will print metallic.
