 Save 10% off your first LabelValue order |
 How to Use the Shape Builder Tool in Adobe Illustrator: Design Tips Post #8
- May 11, 2017
LabelValue's Design Tips Mini-Series is an 8-part installment of design-focused blog posts giving you helpful tips, tricks and insight from our team of graphic designers. Using these design tutorials along with strong design principles, you can create excellent labels that will capture the attention of many potential consumers.
For Part 8 of our Design Mini-Series, we will explore the Shape Builder Tool. The Shape Builder tool is a powerful function within Illustrator that allows you to subtract and add to simple shapes to create more complex shapes. Any combination of shapes can be used; shapes created with the pen tool, circles, squares, rectangles, etc.
View all of our design mini-series:
- Tip 1: How to Trace Objects with the Pen Tool
- Tip 2: How to Equally Duplicate a Shape Around A Circle
- Tip 3: How to Link and Embed Images
- Tip 4: How to use the Align Tool in Adobe Illustrator
- Tip 5: How to Use the Shape Builder Tool in Adobe Illustrator
- Tip 6: How to Create a Clipping Mask using Adobe Illustrator
- Tip 7: How to Type on a Circle Using the Path Tool in Adobe Illustrator
- Tip 8: How to Use the Shape Builder Tool in Adobe Illustrator - Currently Reading
As always, if you have questions feel free to reach out to us by e-mail. We'd love to hear your questions.
Design Tip #8: Using the Shape Builder Tool
Note: Any strokes must be expanded before being able to be combined with the Shape Builder Tool.
Now that we understand the basics of the Shape Builder Tool, let’s start creating something with it! For this tutorial, we will be using the Shape Builder Tool to create a simplistic label for a plant nursery. This will be going on a square label that a potential customer could easily customize to place on all of their sold plants and trees. For the purpose of this tutorial, we will use the generic name of “Bluebird Botanical Nursery.” We will be using Adobe Illustrator CC, be sure to check your version of Illustrator to make sure the Shape Builder Tool is supported.
How to create complex shapes using the Shape Builder Tool in Adobe Illustrator

STEP 1: Begin by creating a new document in Adobe Illustrator. We created a document that is 4” x 4”, with a 0.063” (1.6 mm) bleed and CMYK color mode. These will be printed as a label so we create the parameters of the document around what our end goal for the design will be. This is a great design principle to follow and will lead to far less issues down the road.

STEP 2: With your new document open, we will begin by laying out what we want our custom label to look like. The first step in our label is to create a stylized tree. Begin by selecting the ellipse tool. We will use this for the foliage of the tree.

STEP 3: With your ellipse tool selected, press ALT + SHIFT on windows and drag your mouse to create a perfect circle. Now add two more smaller circles using the same shortcut. Model your tree after what we have above.

STEP 4: Now we are going to select all of the shapes by dragging our mouse and selecting them. Once they are selected navigate to the Shape Builder Tool.

STEP 5: You will notice when you hover over a selected shape, the interior will be “grayed” out. The shape builder tool works on overlapping shapes. We want to join the largest circle and the smallest circle as one joint shape first. Hover over where the small circle and the largest circle overlap and hold down ALT. You will see your cursor will change from an arrow with a plus sign (+), to an arrow with a subtraction sign (-). What you are doing here is essentially subtracting the area of the smallest circle to join it with the largest one.

STEP 6: Click on the lines of the smaller circle with ALT held down until you have the same thing as created above. We have used the Shape Builder tool to combine the two circles into one.

STEP 7: Now we will use the shape of the combined two circles to get the desired shape of medium sized circle using the Shape Builder Tool again. Again hover your mouse with the Shape Builder tool selected over the two overlapping objects.

STEP 8: Click on the stroke of the overlapped circle while holding ALT. Continue to do so until you have the same as what is created above.

STEP 9: Now we will use the “Add” function of Shape Builder tool to combine the two shapes into one single shape. With both shapes selected, and the shape builder tool also selected, hold SHIFT and drag your mouse over the two shapes. Your screen should look the same as above.

STEP 10: The result should be one combined shape. Now we will add color to our tree top.

STEP 11: Now that we have our tree top designed, we need a tree trunk. Using the shape builder tool, lets create something simplistic and easy to design. Select your Rectangle Tool and make a long, tall rectangle for our tree trunk.

STEP 12: Using the Direct Selection tool, select the top left anchor point of your rectangle.
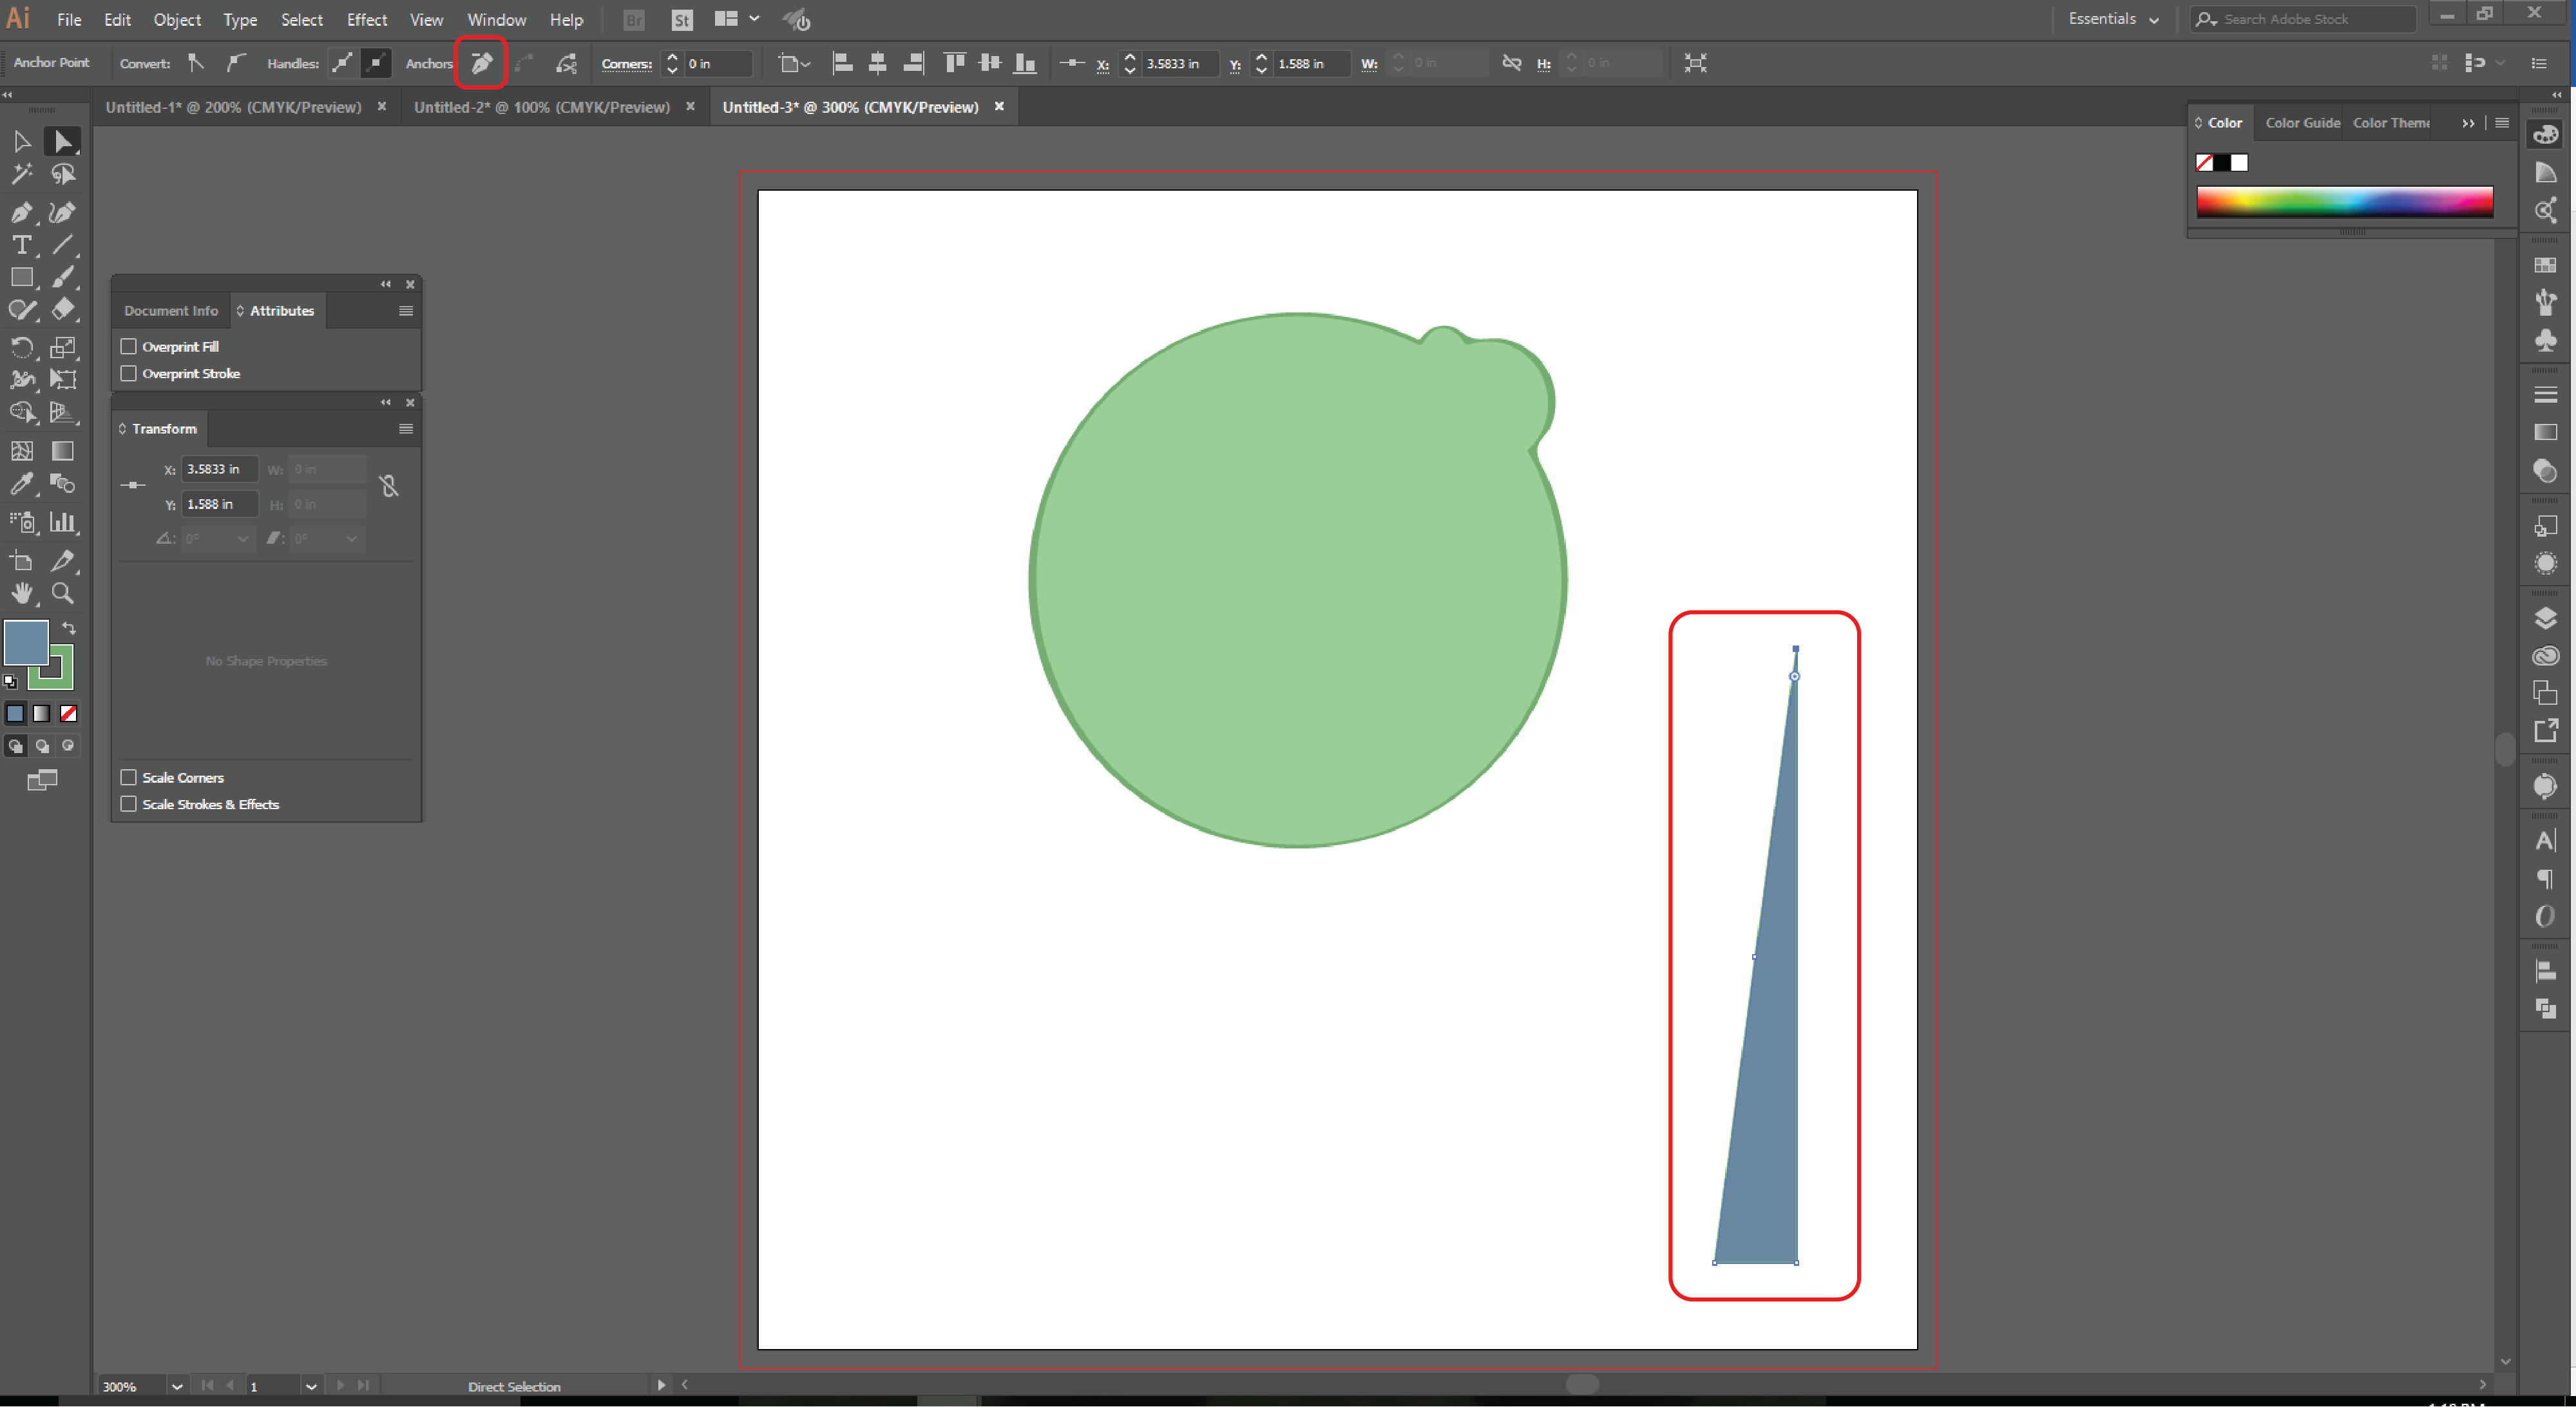
STEP 13: With the top left anchor point selected, navigate to the anchor point sub-menu on the top Illustrator menu. Click the “Remove Selected Anchor Points” icon. This removes that anchor point without disrupting the path of the shape. Your rectangle will change from an elongated rectangle to a triangle.

STEP 14: Now we want to center our point of the tree trunk with the bottom of the trunk. Illustrator makes this easy to do so by using smart guides. Select the top point with the direct selection tool, press and hold shift and drag until the smart guides appear. It automatically gives you alignment guides and lets you know when you are center.

STEP 15: We created branches for the tree using the same process as above. Select your tree trunk, and the two branches and select the Shape Builder tool again. Using the (+) ADD function by holding SHIFT, combine the shapes into one solid shape.

STEP 16: Now add some final touches to your label design. The bluebird, hills and background were all created using the shape builder tool. As you can see this tool can be used to design a variety of tasks and illustrations.
Getting yourself familiar with the shape builder tool can greatly improve not only your design but the speed at which you can create complex shapes and illustrations. We hope this tutorial proved useful and easy to follow instructions. Have any feedback, or need an answer to a design question you have? E-mail us at service@labelvalue.com, address the e-mail to “Graphics Team,” and we will get back to you with an answer shortly.
Create jaw-dropping labels and stickers with InstaProof
Order Your Labels Today