 Save 10% off your first LabelValue order |
 How to trace objects with the pen tool in Adobe Illustrator: Design Tips Post #1
- Mar 24, 2017

Welcome to the LabelValue Design Tips Mini-Series. In this series we will be going over some tips and tricks that we feel could be useful when you are designing your next label artwork. These articles will go over general design information, as well as tutorials on using Adobe Illustrator, which is one of the main softwares of choice when designing for print. As always, if you have questions about your label or need some design help, we're just a phone call or e-mail away! Email us at service@labelvalue.com, address the email to Graphics Team, and we'll be sure to answer your question. We may even write up a tutorial on it!
View all of our design mini-series:
- Tip 1: How to Trace Objects with the Pen Tool - Currently Reading
- Tip 2: How to Equally Duplicate a Shape Around A Circle
- Tip 3: How to Link and Embed Images
- Tip 4: How to use the Align Tool in Adobe Illustrator
- Tip 5: How to Set up Document Bleeds in Adobe Illustrator
- Tip 6: How to Create a Clipping Mask using Adobe Illustrator
- Tip 7: How to Type on a Circle Using the Path Tool in Adobe Illustrator
- Tip 8: How to Use the Shape Builder Tool in Adobe Illustrator
Our design-focused tutorials are all about learning the "ins-and-outs" of the Adobe Creative Suite. Be sure to check back frequently, as we are always adding new design oriented content and posts.
Design Tip #1: Tracing objects with the pen tool in Adobe Illustrator
In Part 1, we will go over how to trace an image in Illustrator using the pen tool and how to use the reflect feature. This is especially useful when converting raster images into vector objects that can be scaled and redesigned.
Tracing an object with the pen tool can be done with any symmetrical object.
For this example, we are going to be using a bottle.
GETTING STARTED TIP 1: First, you want to place the image of your choice into illustrator.
GETTING STARTED TIP 2: Next, you want to lock and dim your image so you can see what you’re doing without moving the image accidentally. Once you have your image imported and selected, you need to lock the layer so that you don’t accidentally move the image while tracing it. Bring up the layers panel by going to Window > Layers. Lock the layers by double clicking the preview thumbnail of the image in the layers tab. This will bring up a new window with a few options, check the Lock box and the dim Images to: 50%.
Now it’s time to learn how to trace using Illustrator!

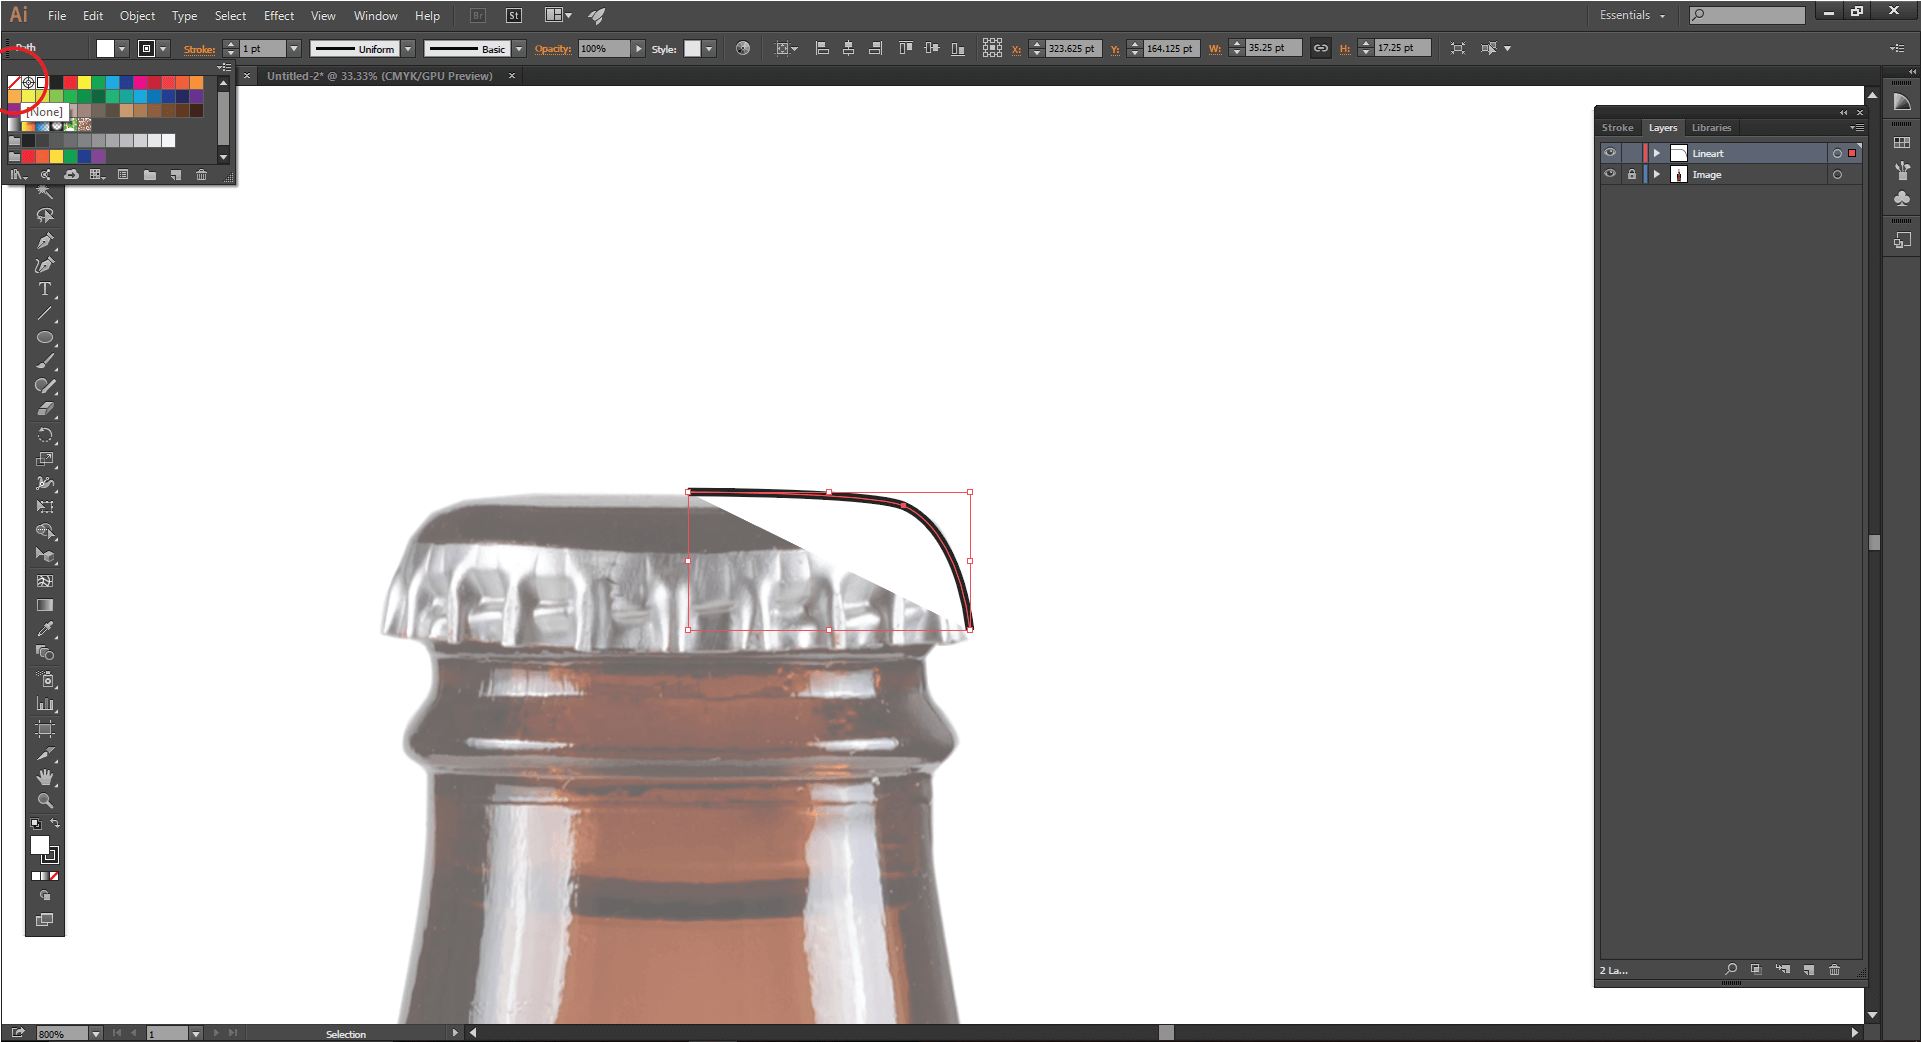
STEP 1: Select the Pen Tool.
We can now select our pen tool either by the selecting the icon in the tool bar or pressing the P key. Select the "P" key to get started with the pen tool.

STEP 2: Start Your Path.
Start by left clicking to start a path and any click after that will put down a point that will be created by a line, you can hold down your left click to curve the point instead of making it a sharp corner. Considering that a bottle is an object with a lot of curves we are going to be primarily using the curved points.
Hint: If you place a point that you are not happy with, simply hit Crt+Z to undo it and try again.
Hint: You can turn off the fill of the shape by switching the fill swatch to none.

STEP 3: Adjust your curves with direct selection tool ("A" key).
The curved points also leave behind a handle on both side that you can use to adjust the roundness of the point. You can do this by selecting the Direct Selection tool by either hitting the white arrow icon on the tool bar or pressing the A key.
Hint: If you want to only control one handle hold down the Alt Key as you are moving the handle.

STEP 4: Repeat until you have half of your object traced.
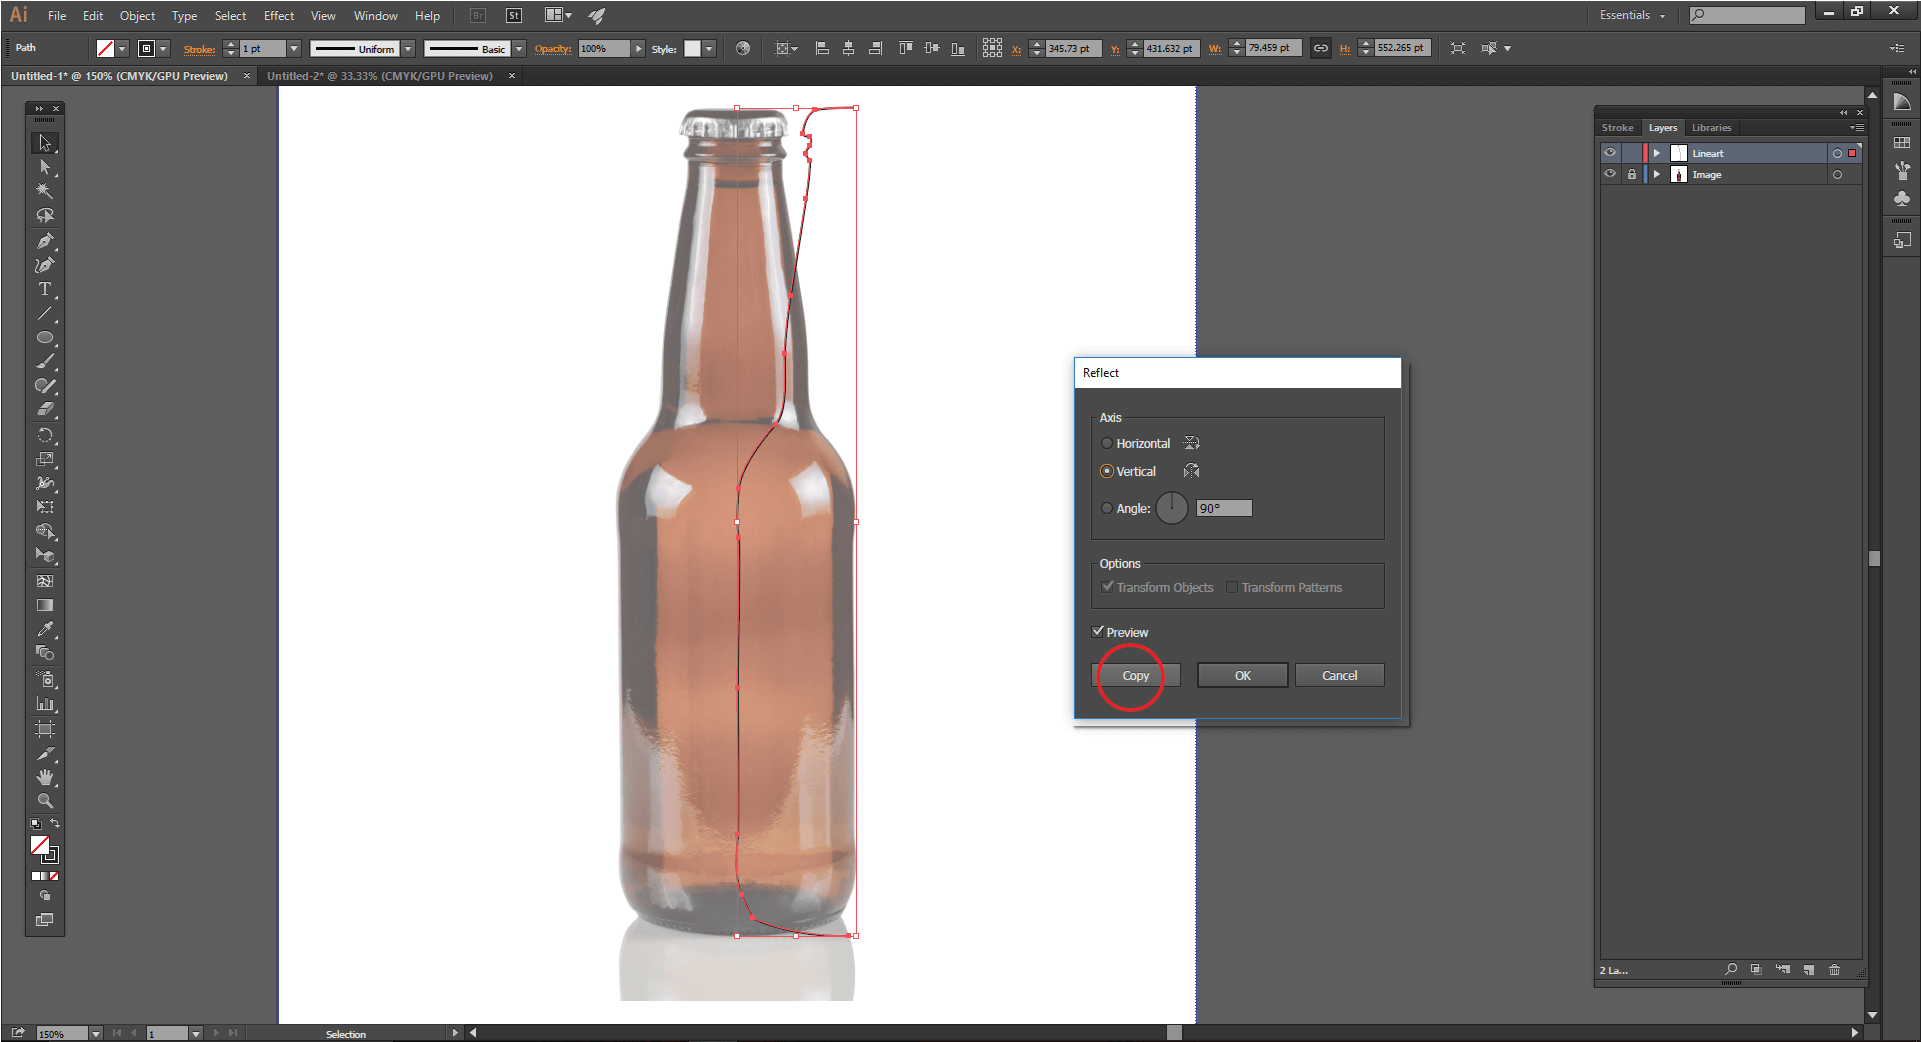
STEP 5: Select the entire path.
Once you completed half of the object you can select the entire path by using the Selection tool by clicking on the black arrow on the toolbar or pressing the V key. Then simply click on your line.

STEP 6: Reflect the path.
Once you have the path selected go to Object > Reflect and select either Horizontal or Vertical based on the object that you are tracing. We are going to use Vertical for our bottle and then click on Copy. This will make a copy of the second side of the bottle so that we can ensure that both sides are identical and perfectly symmetrical.
Hint: You can select preview to see how your path will look after being flipped.
STEP 7: Line up the paths.
Now all we need to do is join the two paths, but first you need to move the new path to the right place. Move over our new path using the arrow keys, to make the movement faster hold down shift as you do it.

STEP 8: Right click and select "Join Paths"
Once you have the paths lined up select both, right click and select join paths. You will have to do this twice so that you connect both end points of your shape.

And there you have it. A full bottle outline object created by the pen tool!
Have a question related to design or the Adobe Creative suite? Send us an email with your question to service@labelvalue.com.
Ready to turn your design into an eye-catching label or sticker?
Get started on your Custom Labels Today!