 Save 10% off your first LabelValue order |
 How to Print Labels From An Excel Spreadsheet Using A Dymo LabelWriter Printer
- Nov 10, 2014
The Dymo LabelWriter printer and included software comes standard with a variety of additional features that makes for easy labeling. A great feature of the Dymo Printer and its software is the ability to set up and print entire Excel lists with just a few easy steps. Many of our customers take advantage of this great feature while using our LabelValue manufactured, Dymo LabelWriter labels. We carry a wide variety of USA-Made Dymo compatible products and can also create a wide range of custom sizes to exactly fit the application you need. View our top products below and learn how to use them to print labels from an Excel Spreadsheet in the article that follows.
Easily Create and Print Dymo LabelWriter Labels from an Excel Spreadsheet
STEP BY STEP GUIDE - How to Print Dymo Labels From an Excel Spreadsheet:
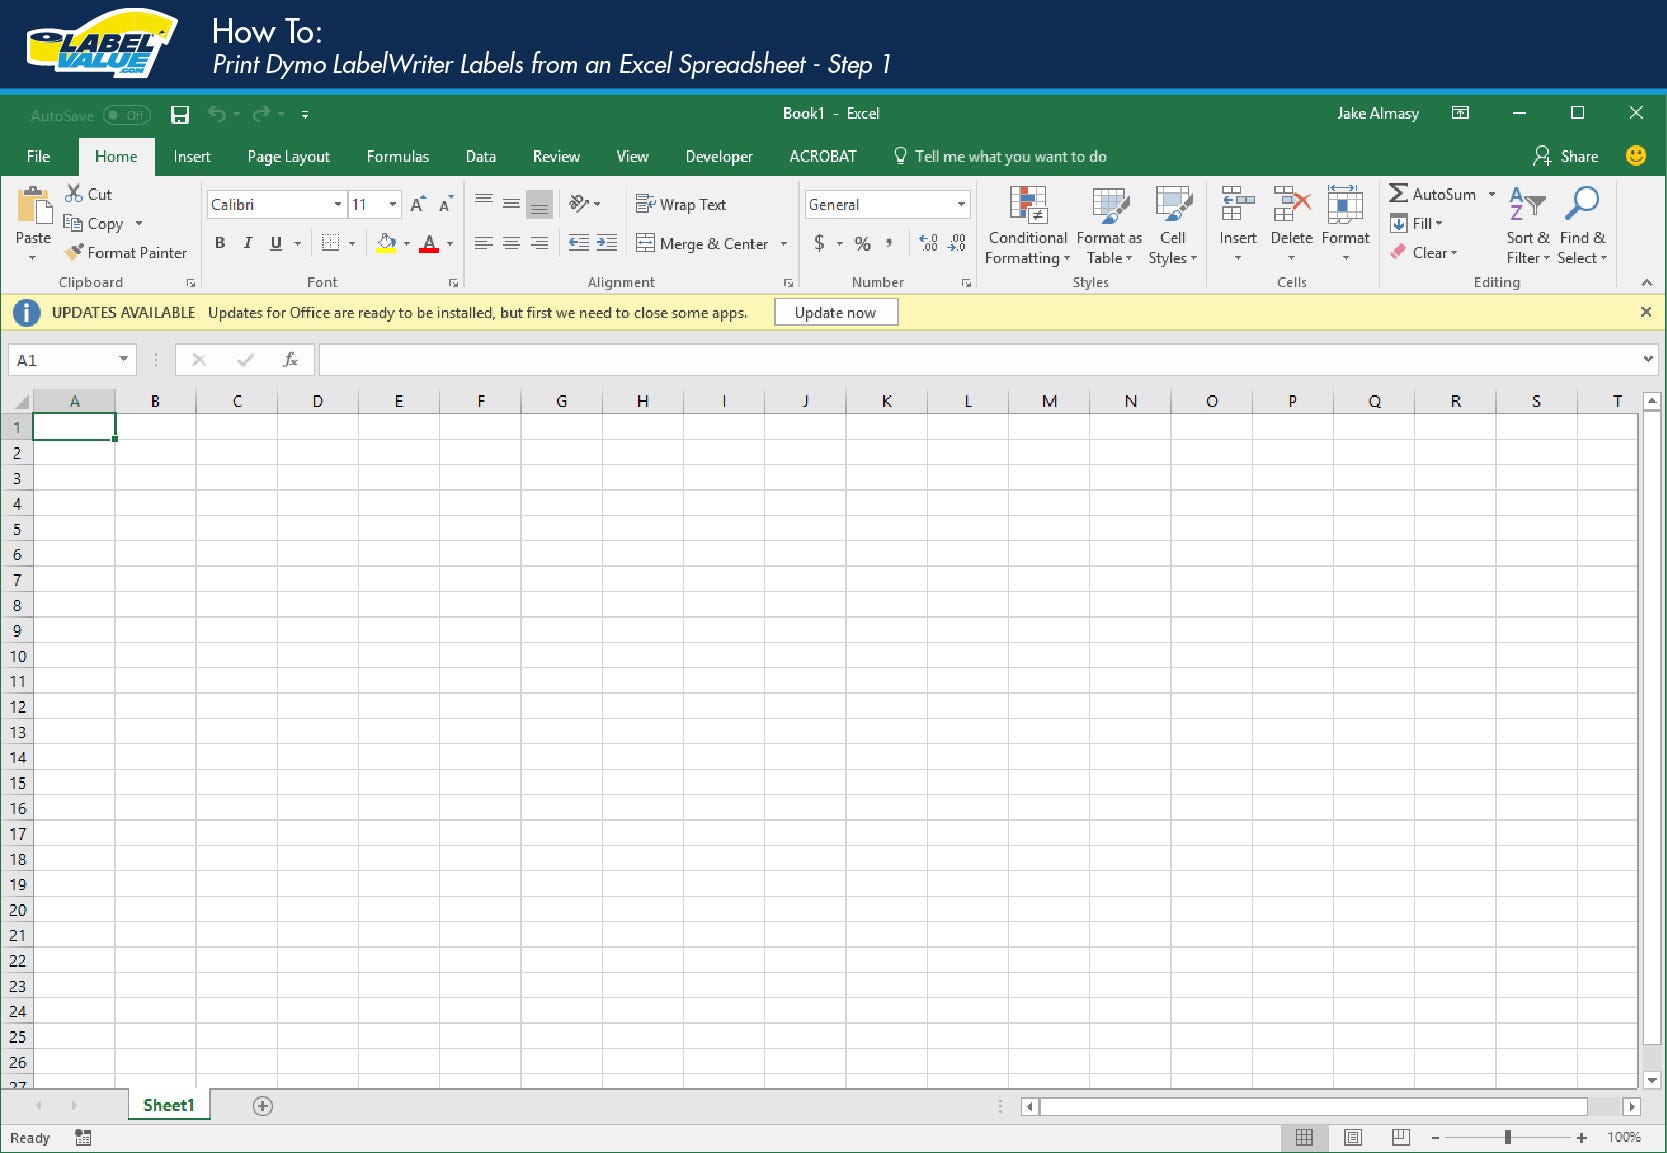
1. Open Microsoft Excel and start with a blank document. Here we will create a list used to print multiple labels on the Dymo LabelWriter.
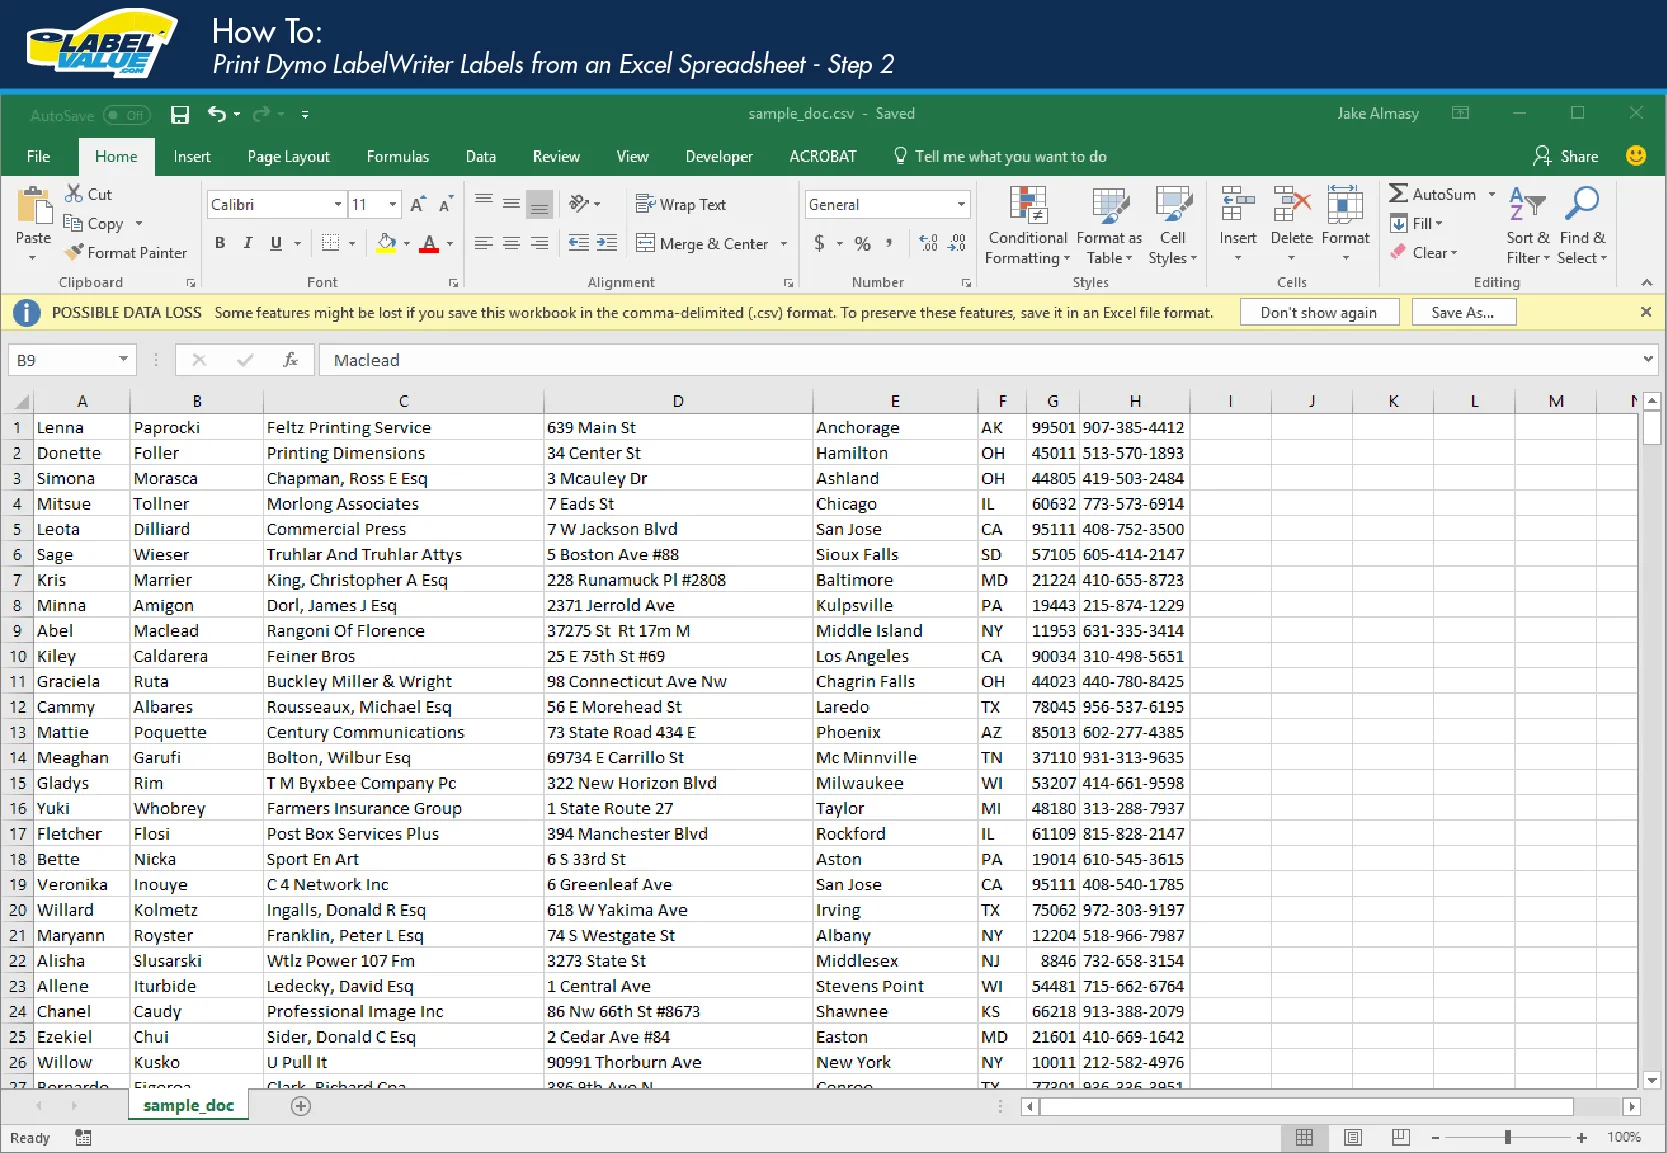
2.When setting up your Excel document, each column should contain the unique information you need to print. As shown in the example, Column A contains first names, Column B contains last names, etc. Continue setting up the excel file in this manner until you have all the required information for your labels.
Note: Column headers (First Name, Last Name, Street, etc.) are not needed when setting up your print file as they will print on your first label.
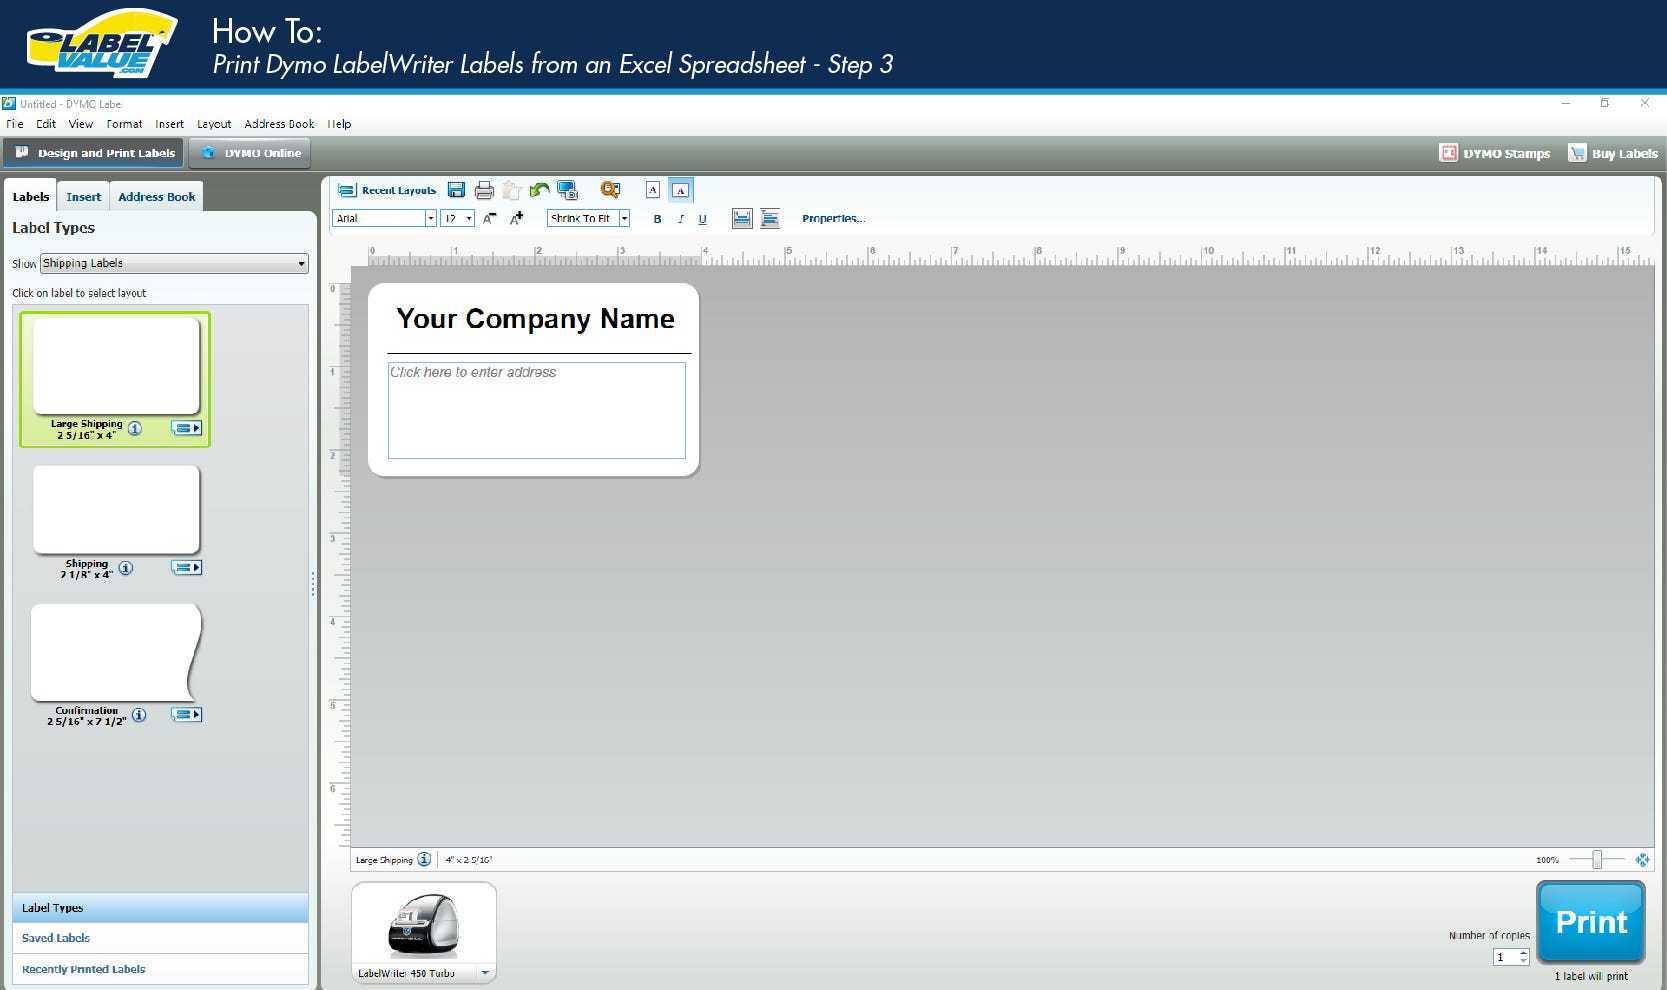
3. Once your list is set up, make sure you save and exit Excel. Now, navigate to your Dymo Label software. Select the type of label you will be using. For this example we will be using our Dymo Compatible 30256 large shipping label.
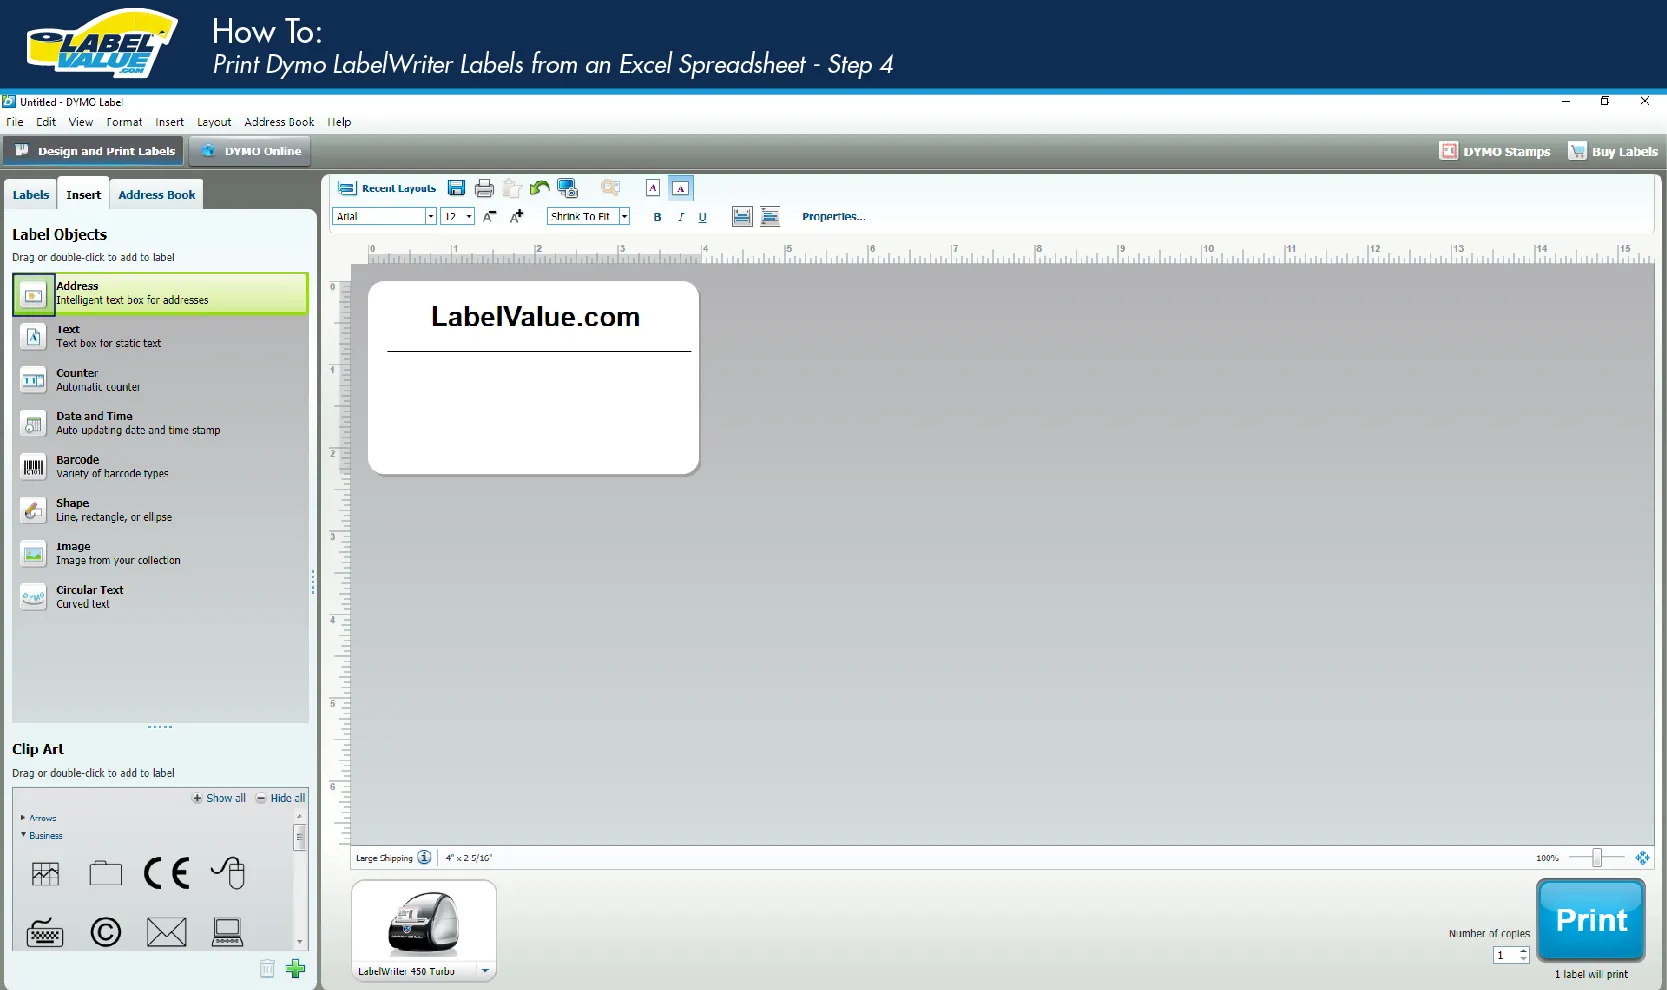
4. The Dymo software makes it easy for you to input your own company name like we have done here in the heading of our label. Once you have input your desired name, navigate to the “Insert” tab within the Dymo LabelWriter software. Within this list of printable objects, select the “Address” box.
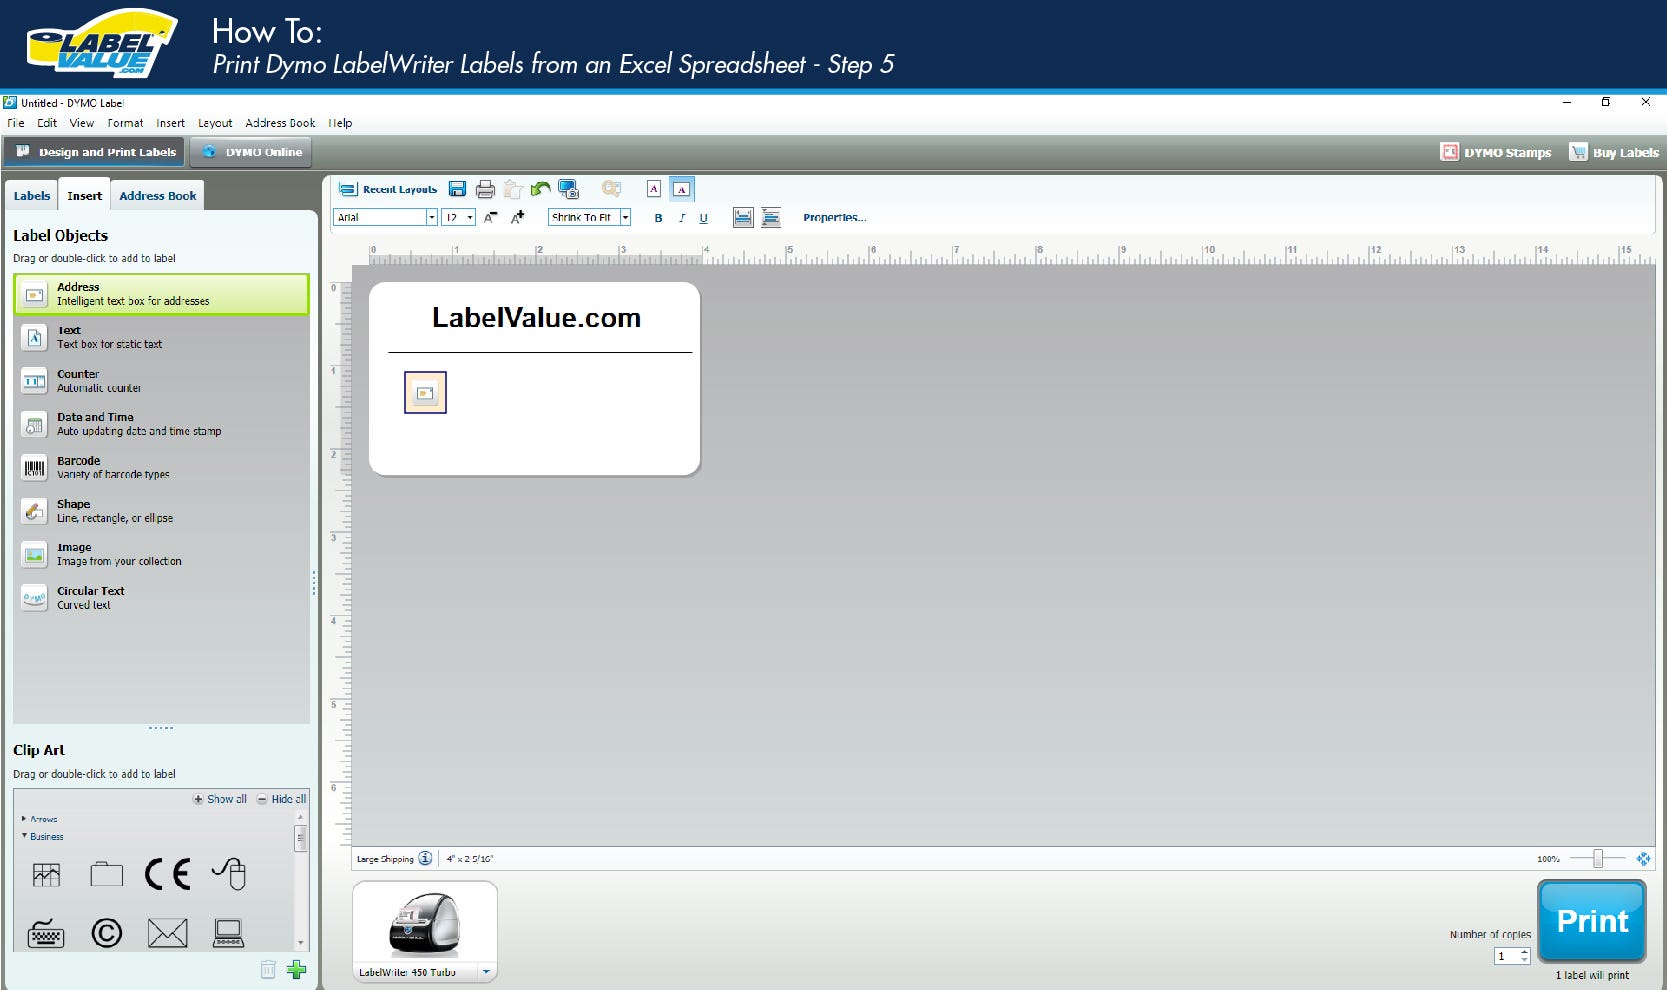
5. Click, hold & drag the address box over to your label. Release your mouse to place the address box on your label.

6. Now, resize your address box to the desired size for your Dymo label.
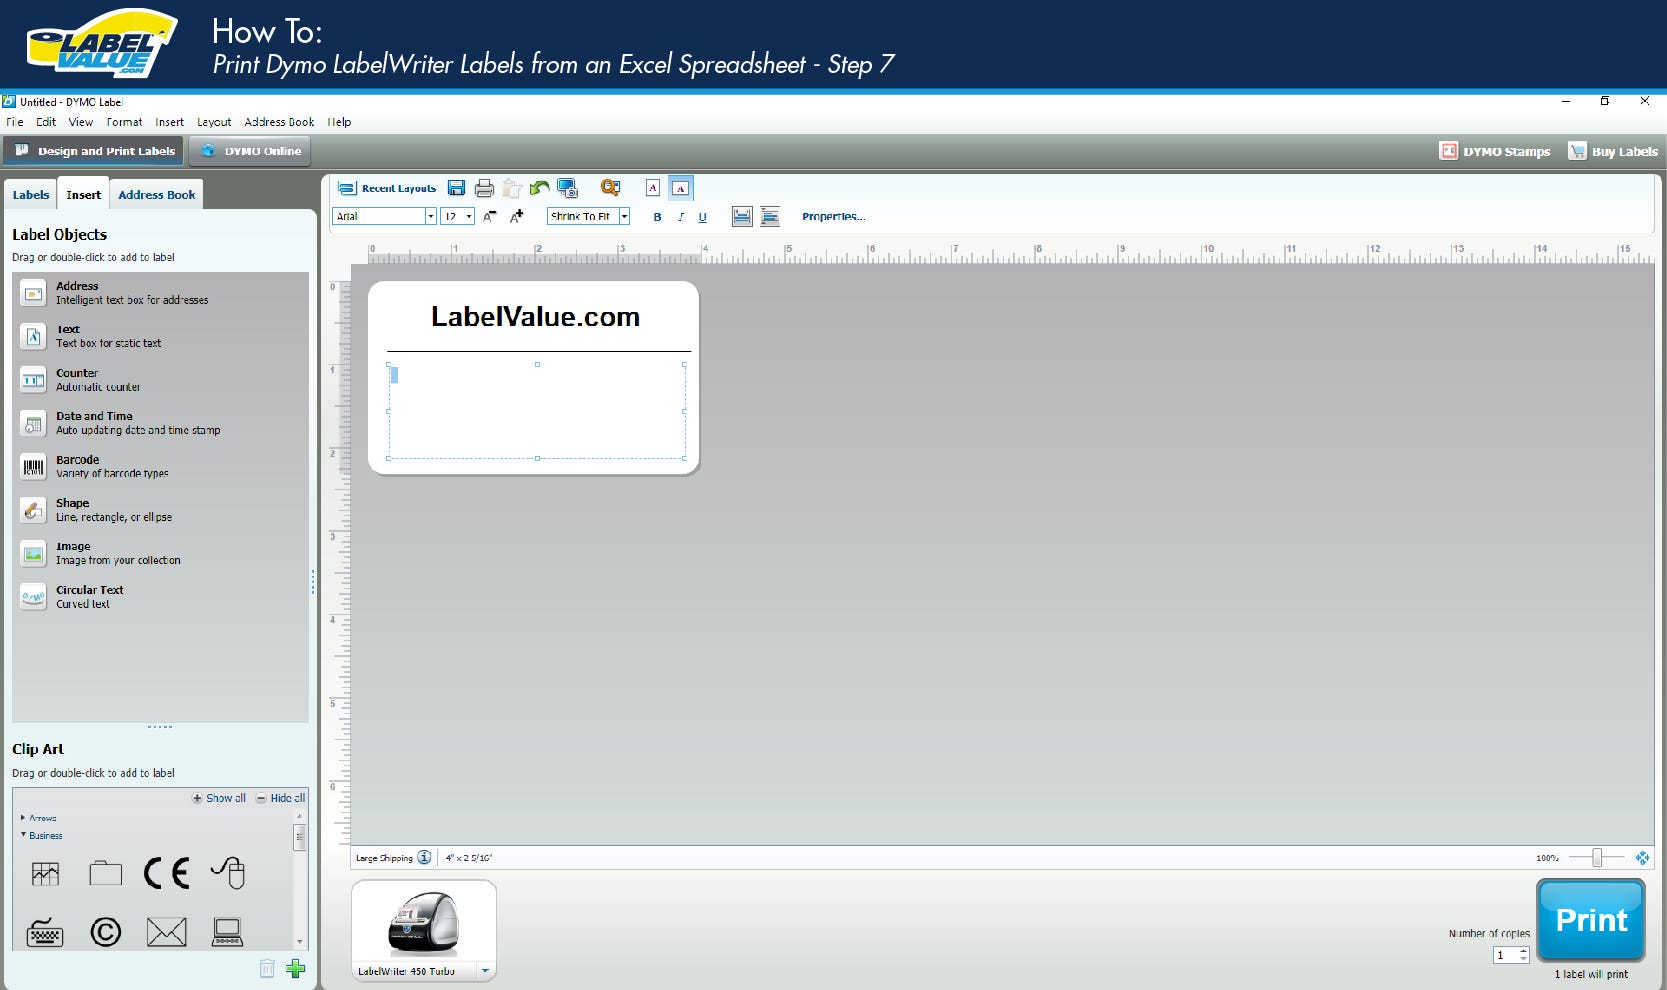
7. Now, using your mouse, click the address box and select it.
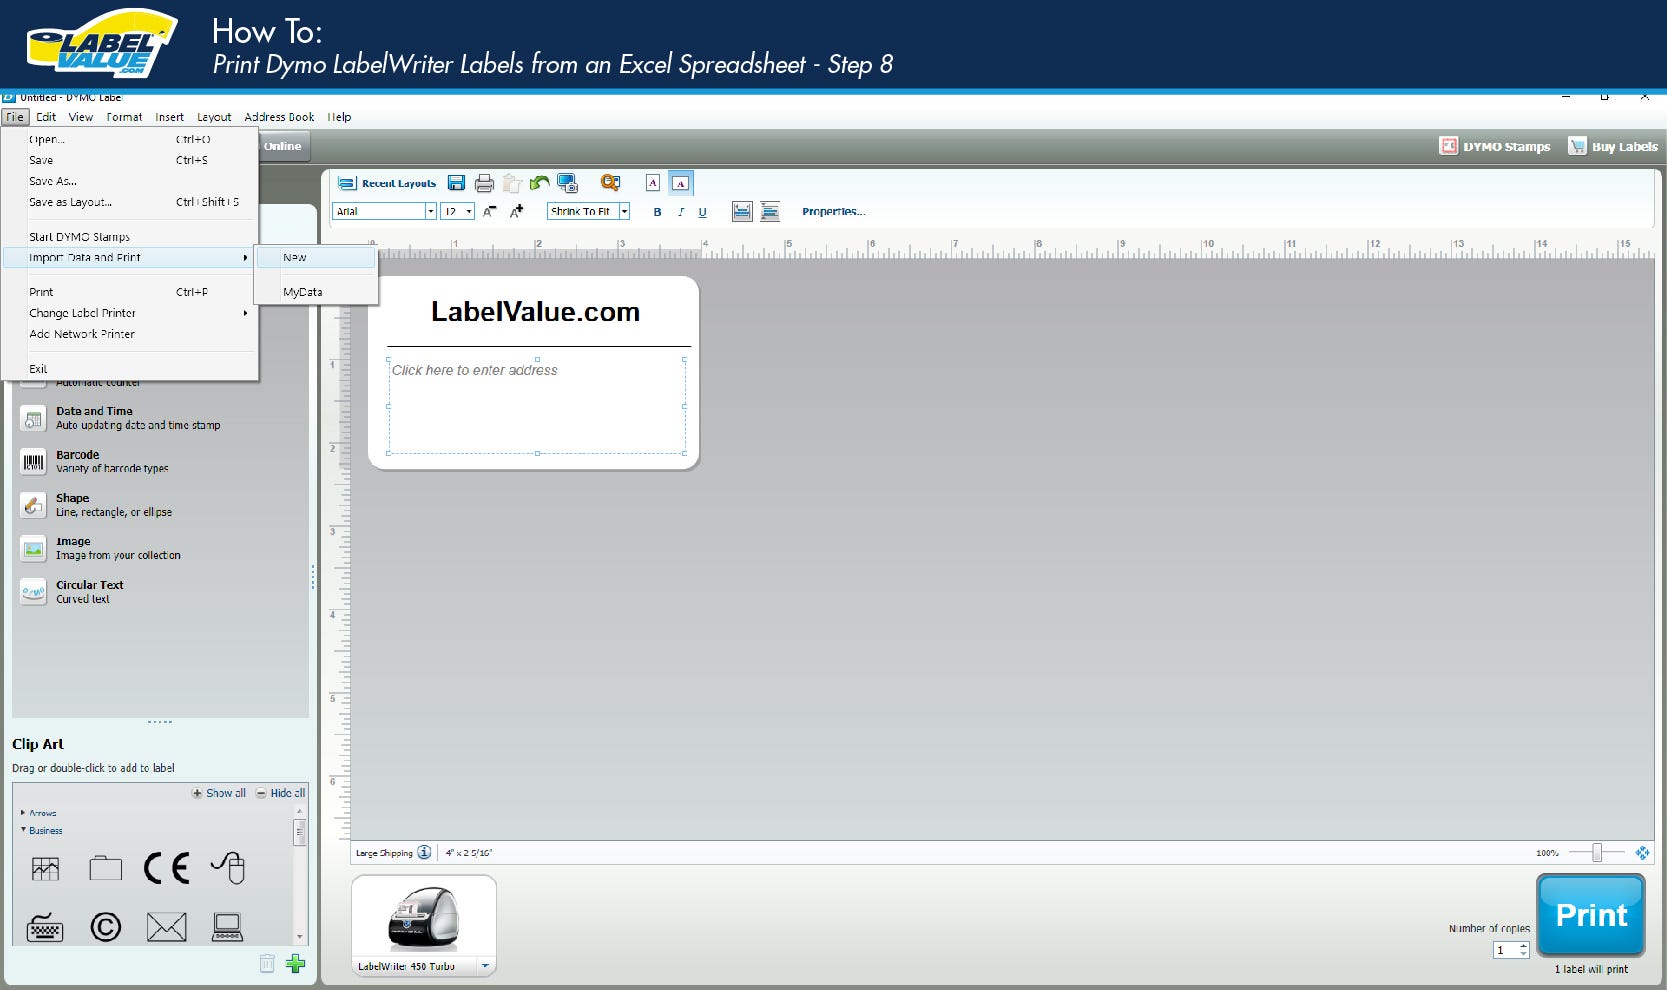
8. While still in the DYMO Print Software, Navigate to File > Import Data and Print > New.
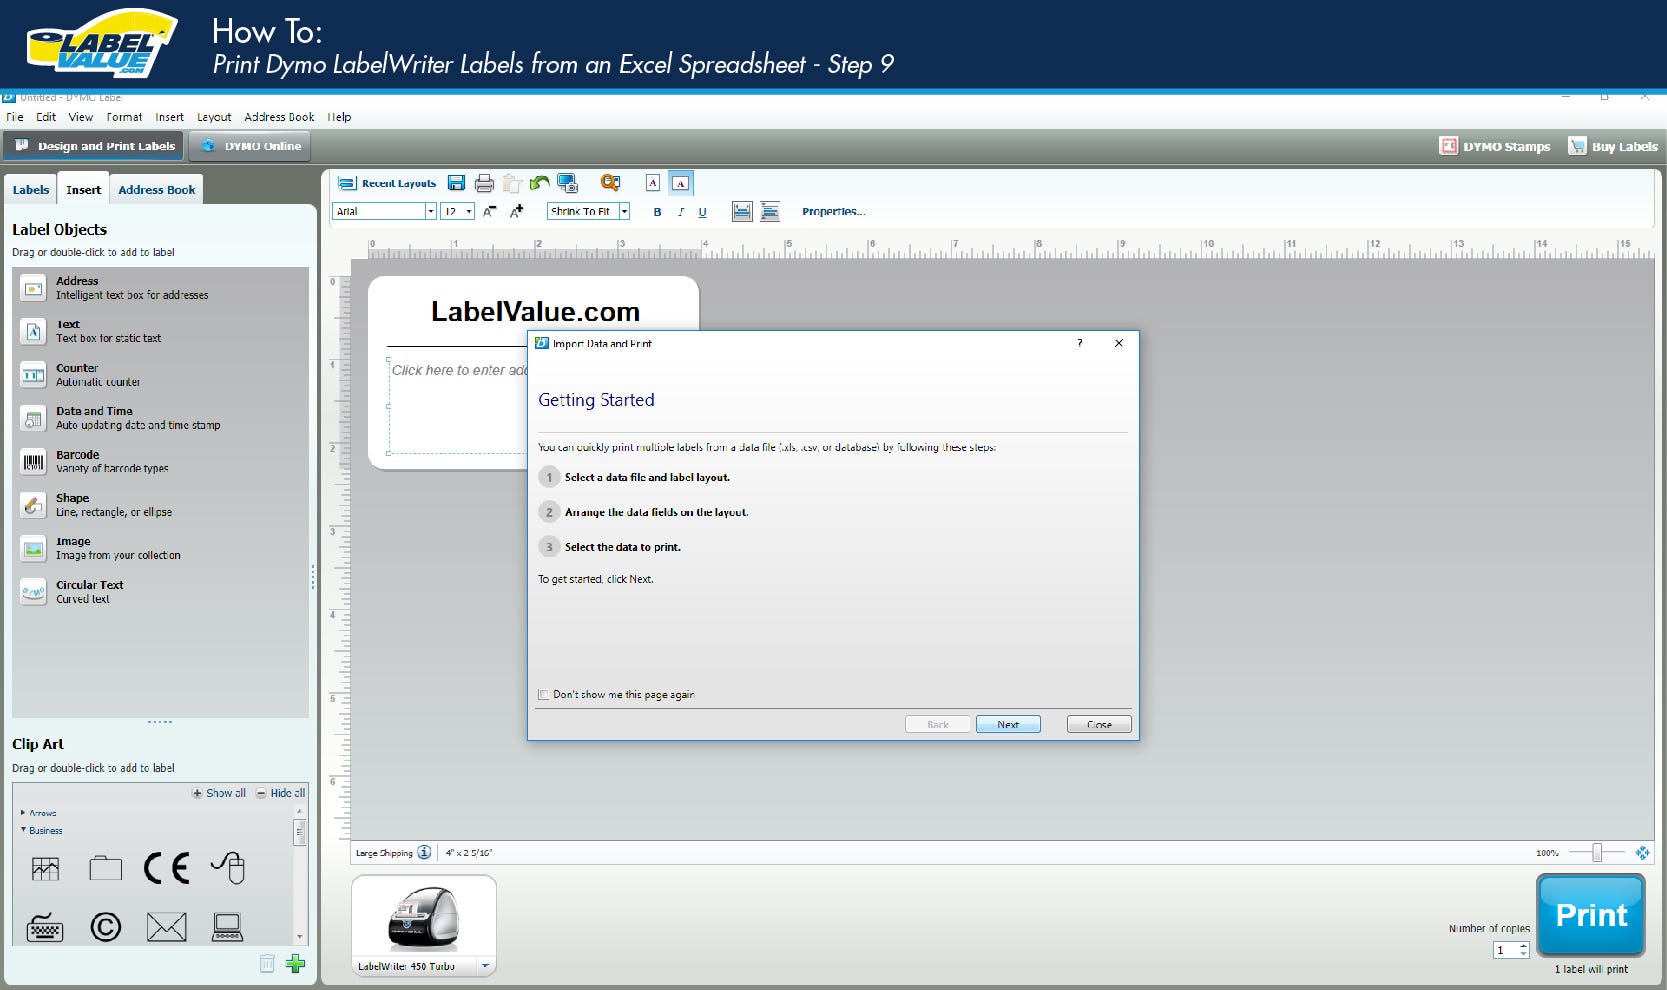
9. When you select "New" a Pop-up will appear for “Import Data and Print.” Click Next.
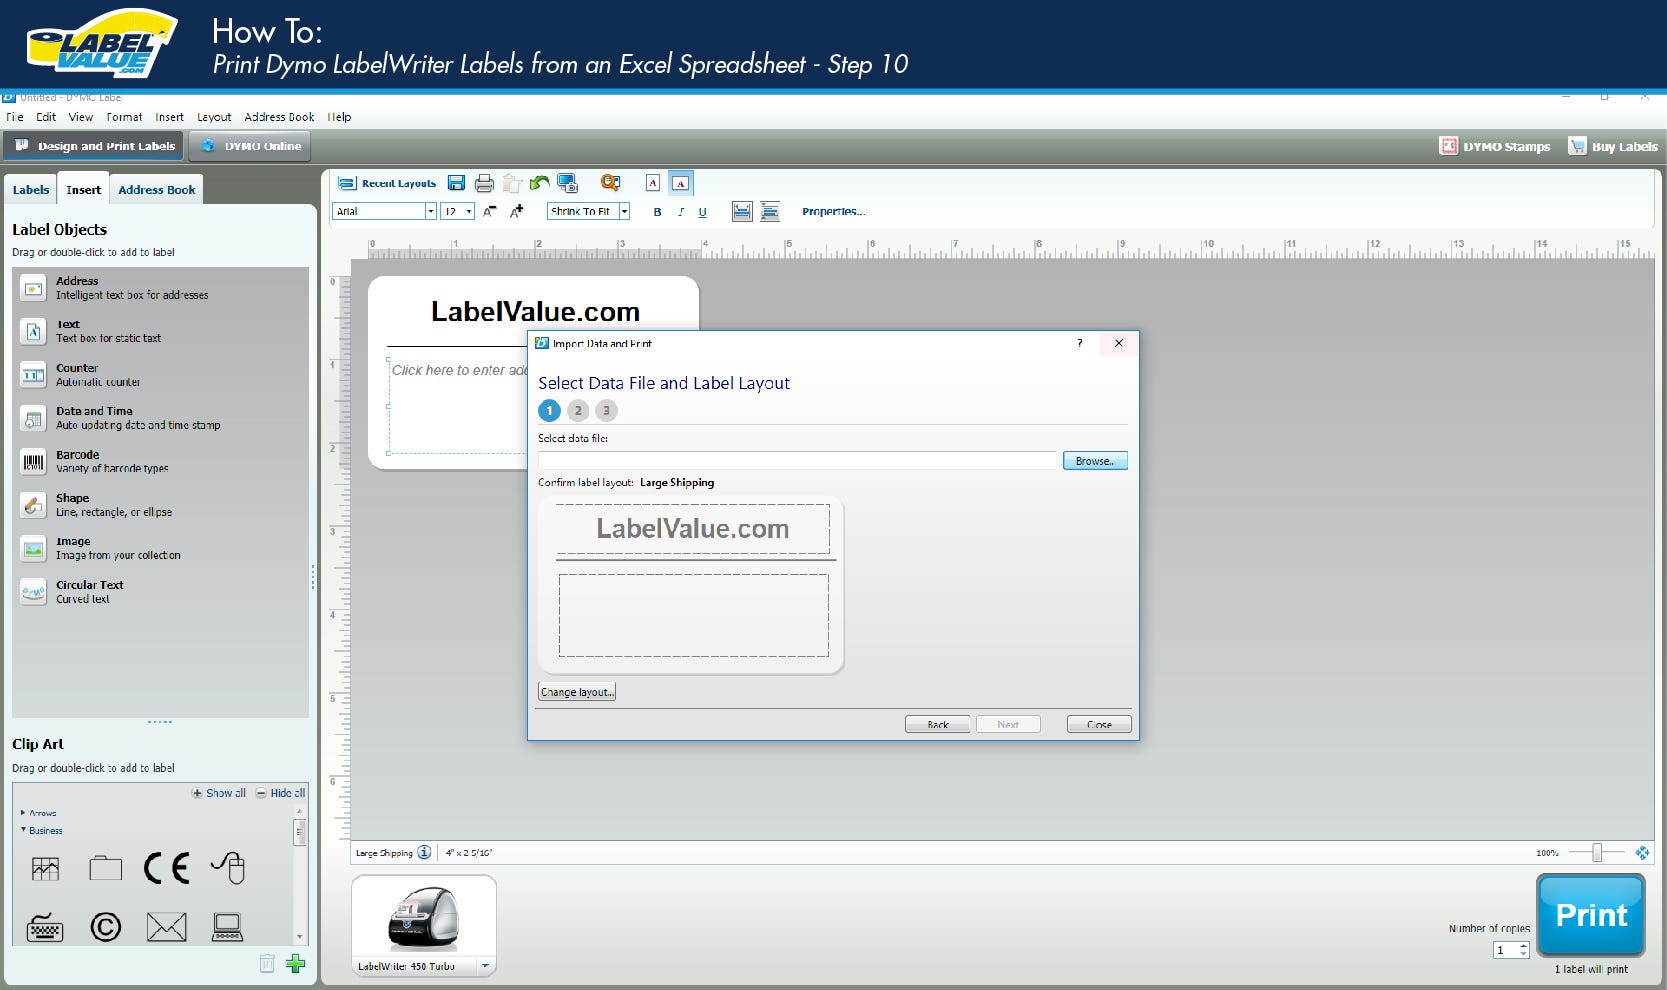
10. Select your data file for your label by using the “browse” function.
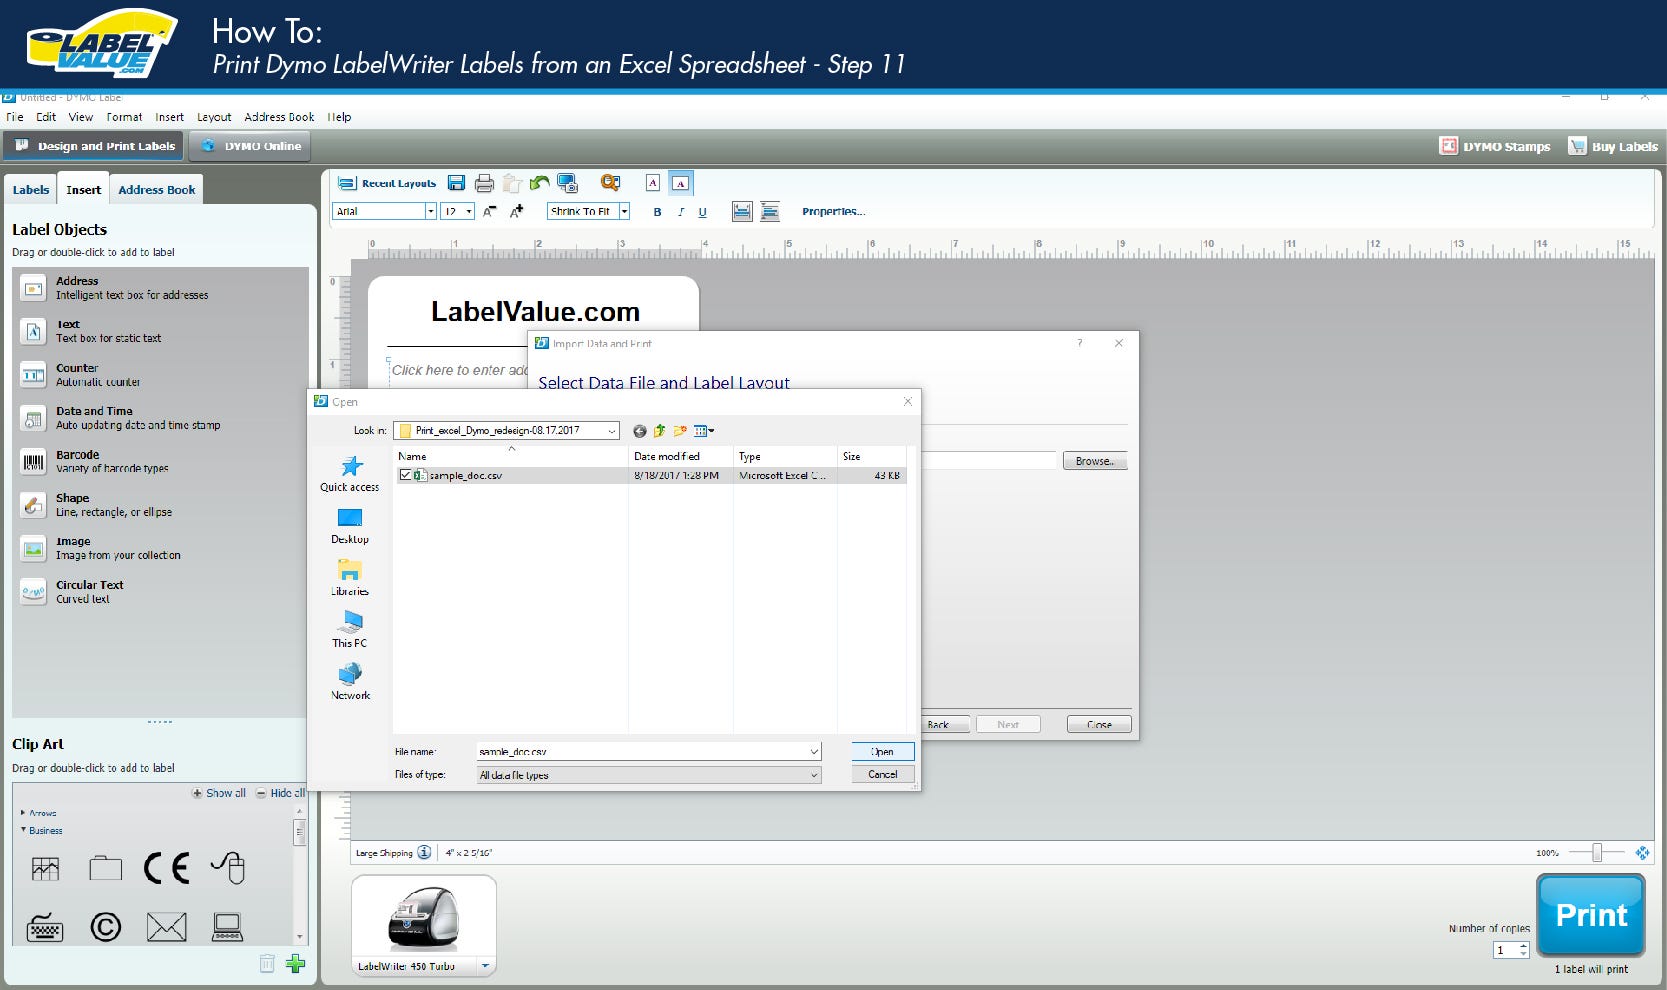
11. Choose the Excel file you just created and select “open.”
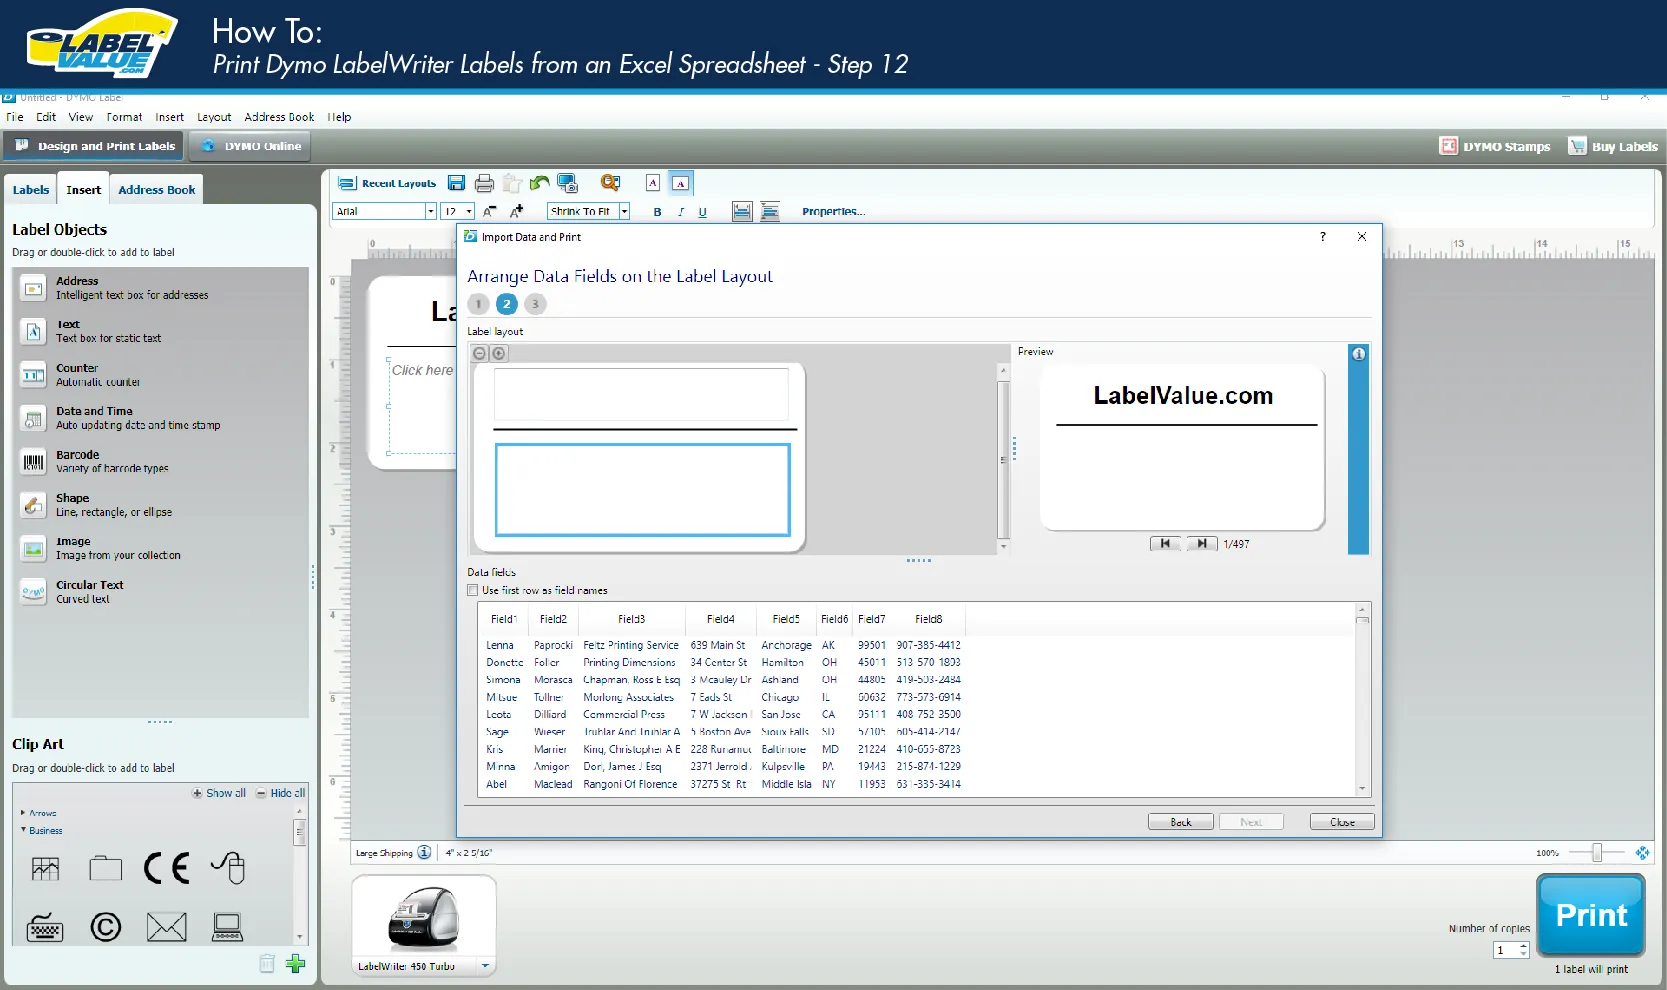
12. Click next, which will bring you to the following step in importing your data. Here you need to select the address box you just created as the destination for your data fields.

13. Now simply drag and drop your columns to your desired output by using your mouse and clicking on the field name (Field1, Field2, Field3, etc.) You can have more than one field on a line as shown in the preview. The DYMO software gives you a real-time preview to the right so you can see what your labels will look like when printed.
Note: To delete a field, click on the line with the field you want to remove and use your Backspace Key.

14. Once you have your label set up how you like it, press next. This will bring up last step in the “Import Data and Print” process. Here you can select if you want to print your entire list, or a select few. To do so, use the check boxes on the left-hand side of your list to either select all or select specific entries.
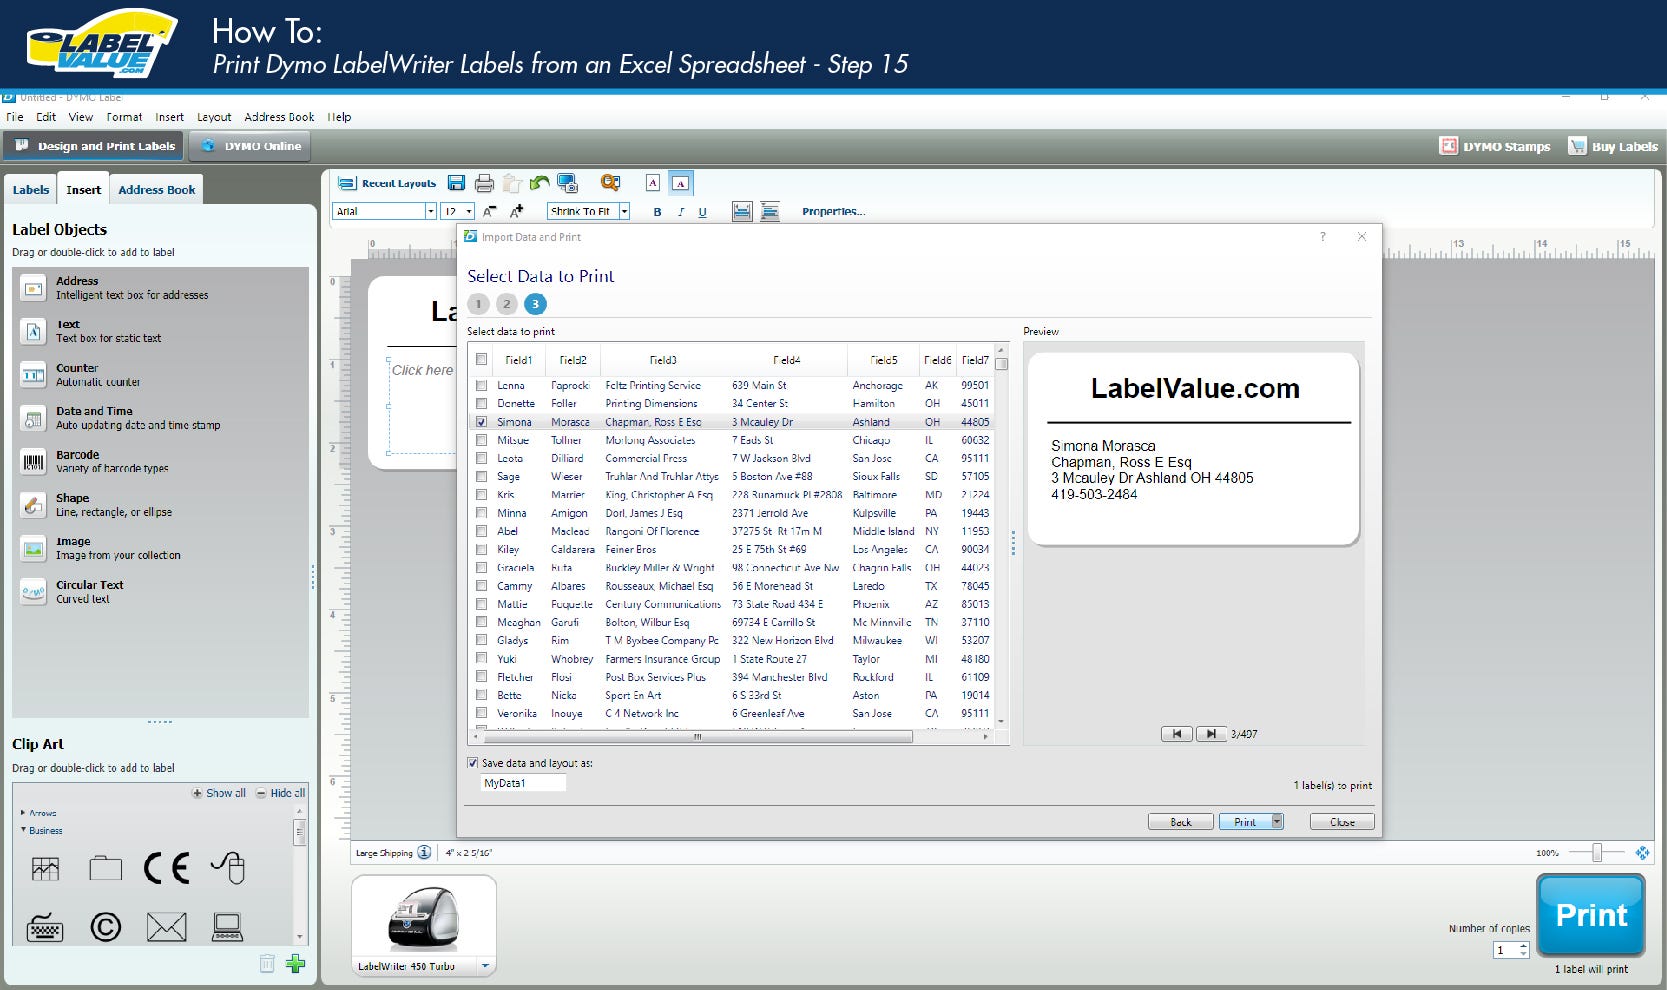
15. When you have selected all the entries you need to print, click on the “Print” button in the lower right hand corner. Your labels will now print with different information on each label depending on what was input into the Excel file.
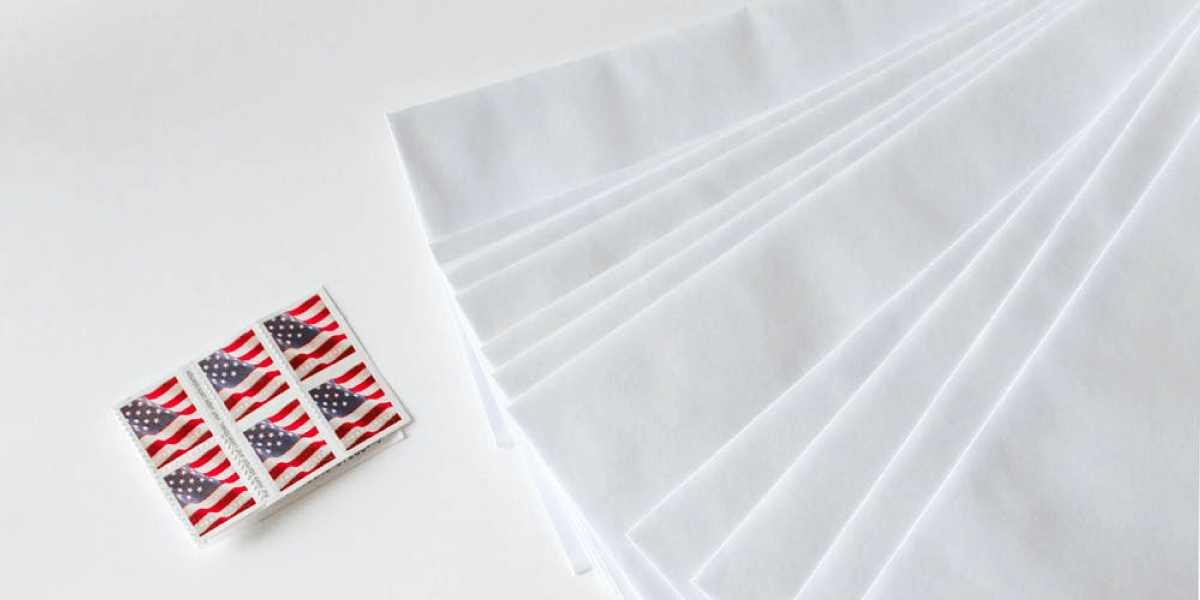
Using a Label Printer around the office or home can greatly increase your organization and productivity. Use this simple tutorial on printing labels from Excel in combination with our DYMO compatible labels to address holiday cards, birthday invitations, even monthly invoices.
Check out LabelValue.com’s extensive inventory of Dymo Compatible Labels for virtually any application. Don’t see the size you’re looking for? Contact us today! We offer custom Dymo label sizes, as well as full-color labels that are compatible with LabelWriter printers.