 Save 10% off your first LabelValue order |
 How to Create a Clipping Mask in Adobe Illustrator: Design Tips Post #6
- Apr 28, 2017
LabelValue's Design Tips Mini-Series is an 8-part installment of useful design knowledge that comes directly from our team of designers. We feature helpful hints and design tips to help you in the process of designing great labels! This week we will be going over how to create clipping masks in Adobe Illustrator.
View all of our design mini-series:
- Tip 1: How to Trace Objects with the Pen Tool
- Tip 2: How to Equally Duplicate a Shape Around A Circle
- Tip 3: How to Link and Embed Images
- Tip 4: How to use the Align Tool in Adobe Illustrator
- Tip 5: How to Create a Clipping Mask in Adobe Illustrator
- Tip 6: How to Create a Clipping Mask using Adobe Illustrator-
- Tip 7: How to Type on a Circle Using the Path Tool in Adobe Illustrator
- Tip 8: How to Use the Shape Builder Tool in Adobe Illustrator
As always, if you have questions feel free to reach out to us by e-mail. We'd love to hear from you!
Creating a Clipping Mask in Adobe Illustrator
What is a Clipping Mask?
This useful tool allows you to incorporate textures, imagery, and patterns into areas of vector art that would be otherwise impossible.
Basically, a clipping mask is an object within Illustrator that uses a shape’s properties to mask areas of your design. The only visible areas of a clipping mask are what’s within the mask’s shape. A clipping mask and any objects within a mask are referred to as a clipping set. Clipping sets can be made from a selection of two or more objects. The shape or object of a clipping mask will not have a fill or stroke.
How do I Create a Clippng Mask Using Adobe Illustrator?
Now that we have a general understanding of what a clipping mask is and how it works, let’s create one. All recent versions of Illustrator will have the functionality to create clipping masks.
Follow along with the tutorial below to learn how to easily create a clipping mask.
How to Create A Clippng Mask - A Step by Step Tutorial

STEP 1: Create a document that will fit your design needs. For this tutorial, we will be using a 4” x 4” square, 1.6mm bleed, and CMYK color mode as we intend to use this for a printed label for LabelValue.com

STEP 2: With your document open, bring in all the elements you will need for your design. For this tutorial, we will be designing a beer label. As you can see, we have text, a pattern for our background, and a shape that we have previously made for our clipping mask.
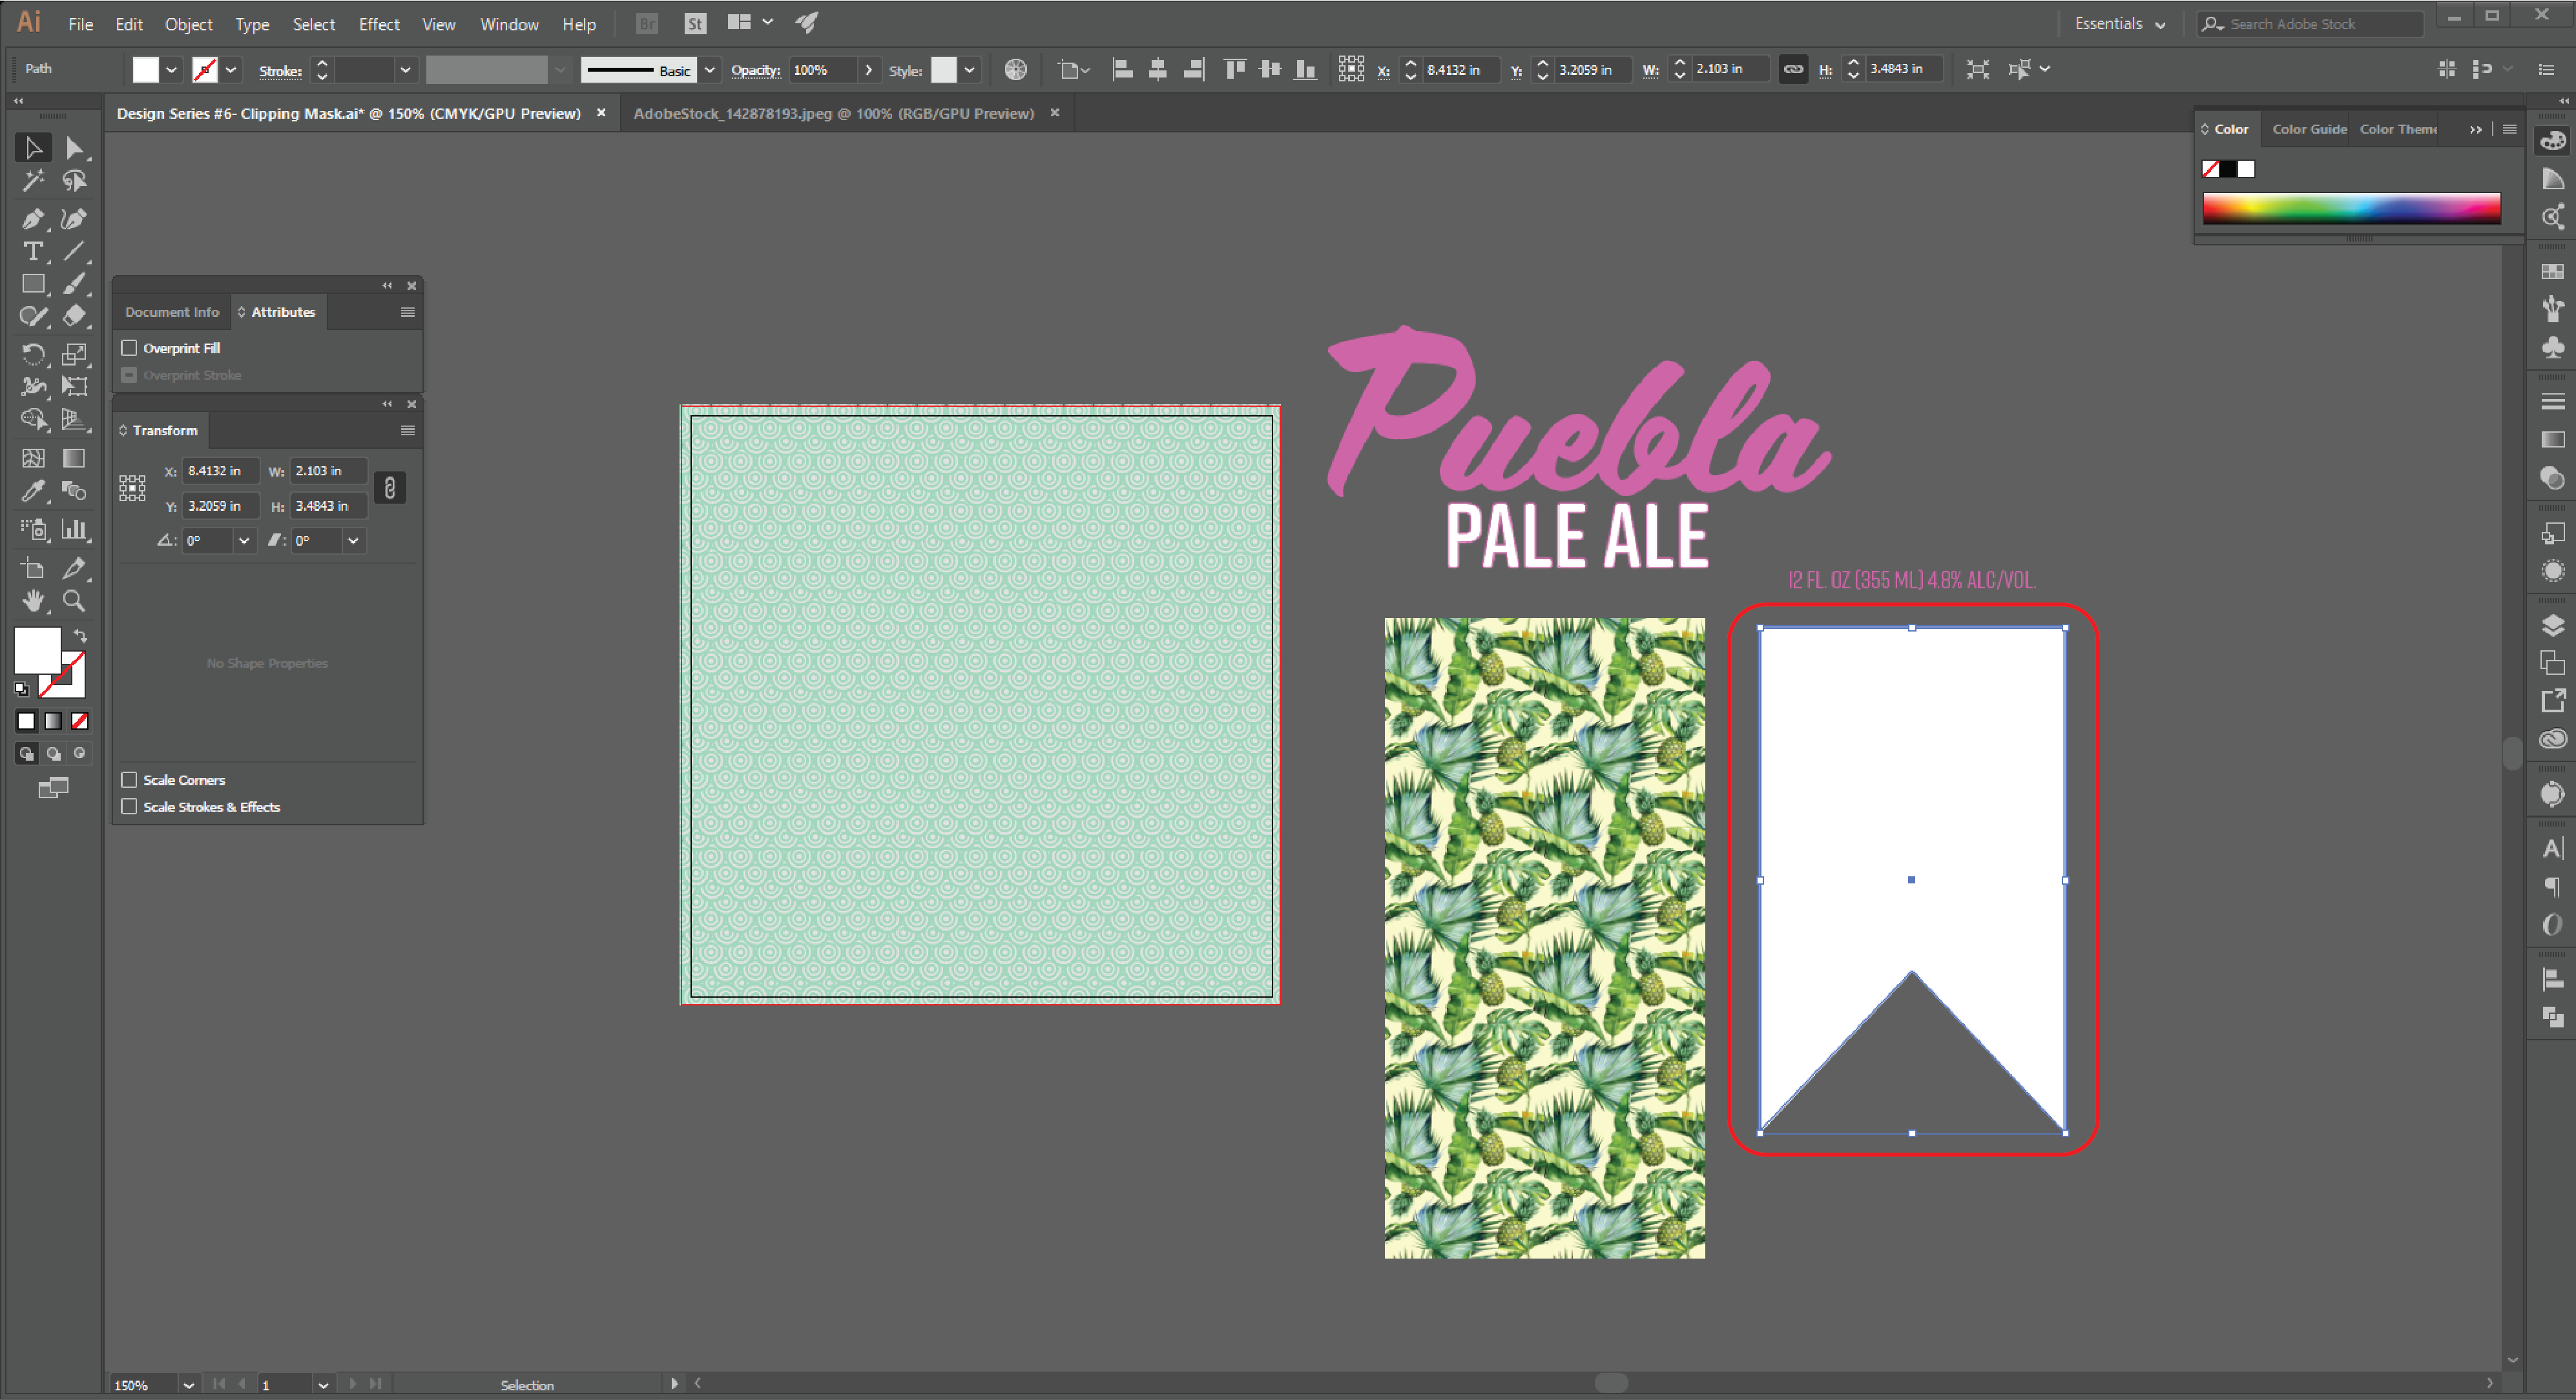
STEP 3: With your elements placed in your working file, select the shape you will be using for your clipping mask. For this label, we are using a banner created with the pen tool.
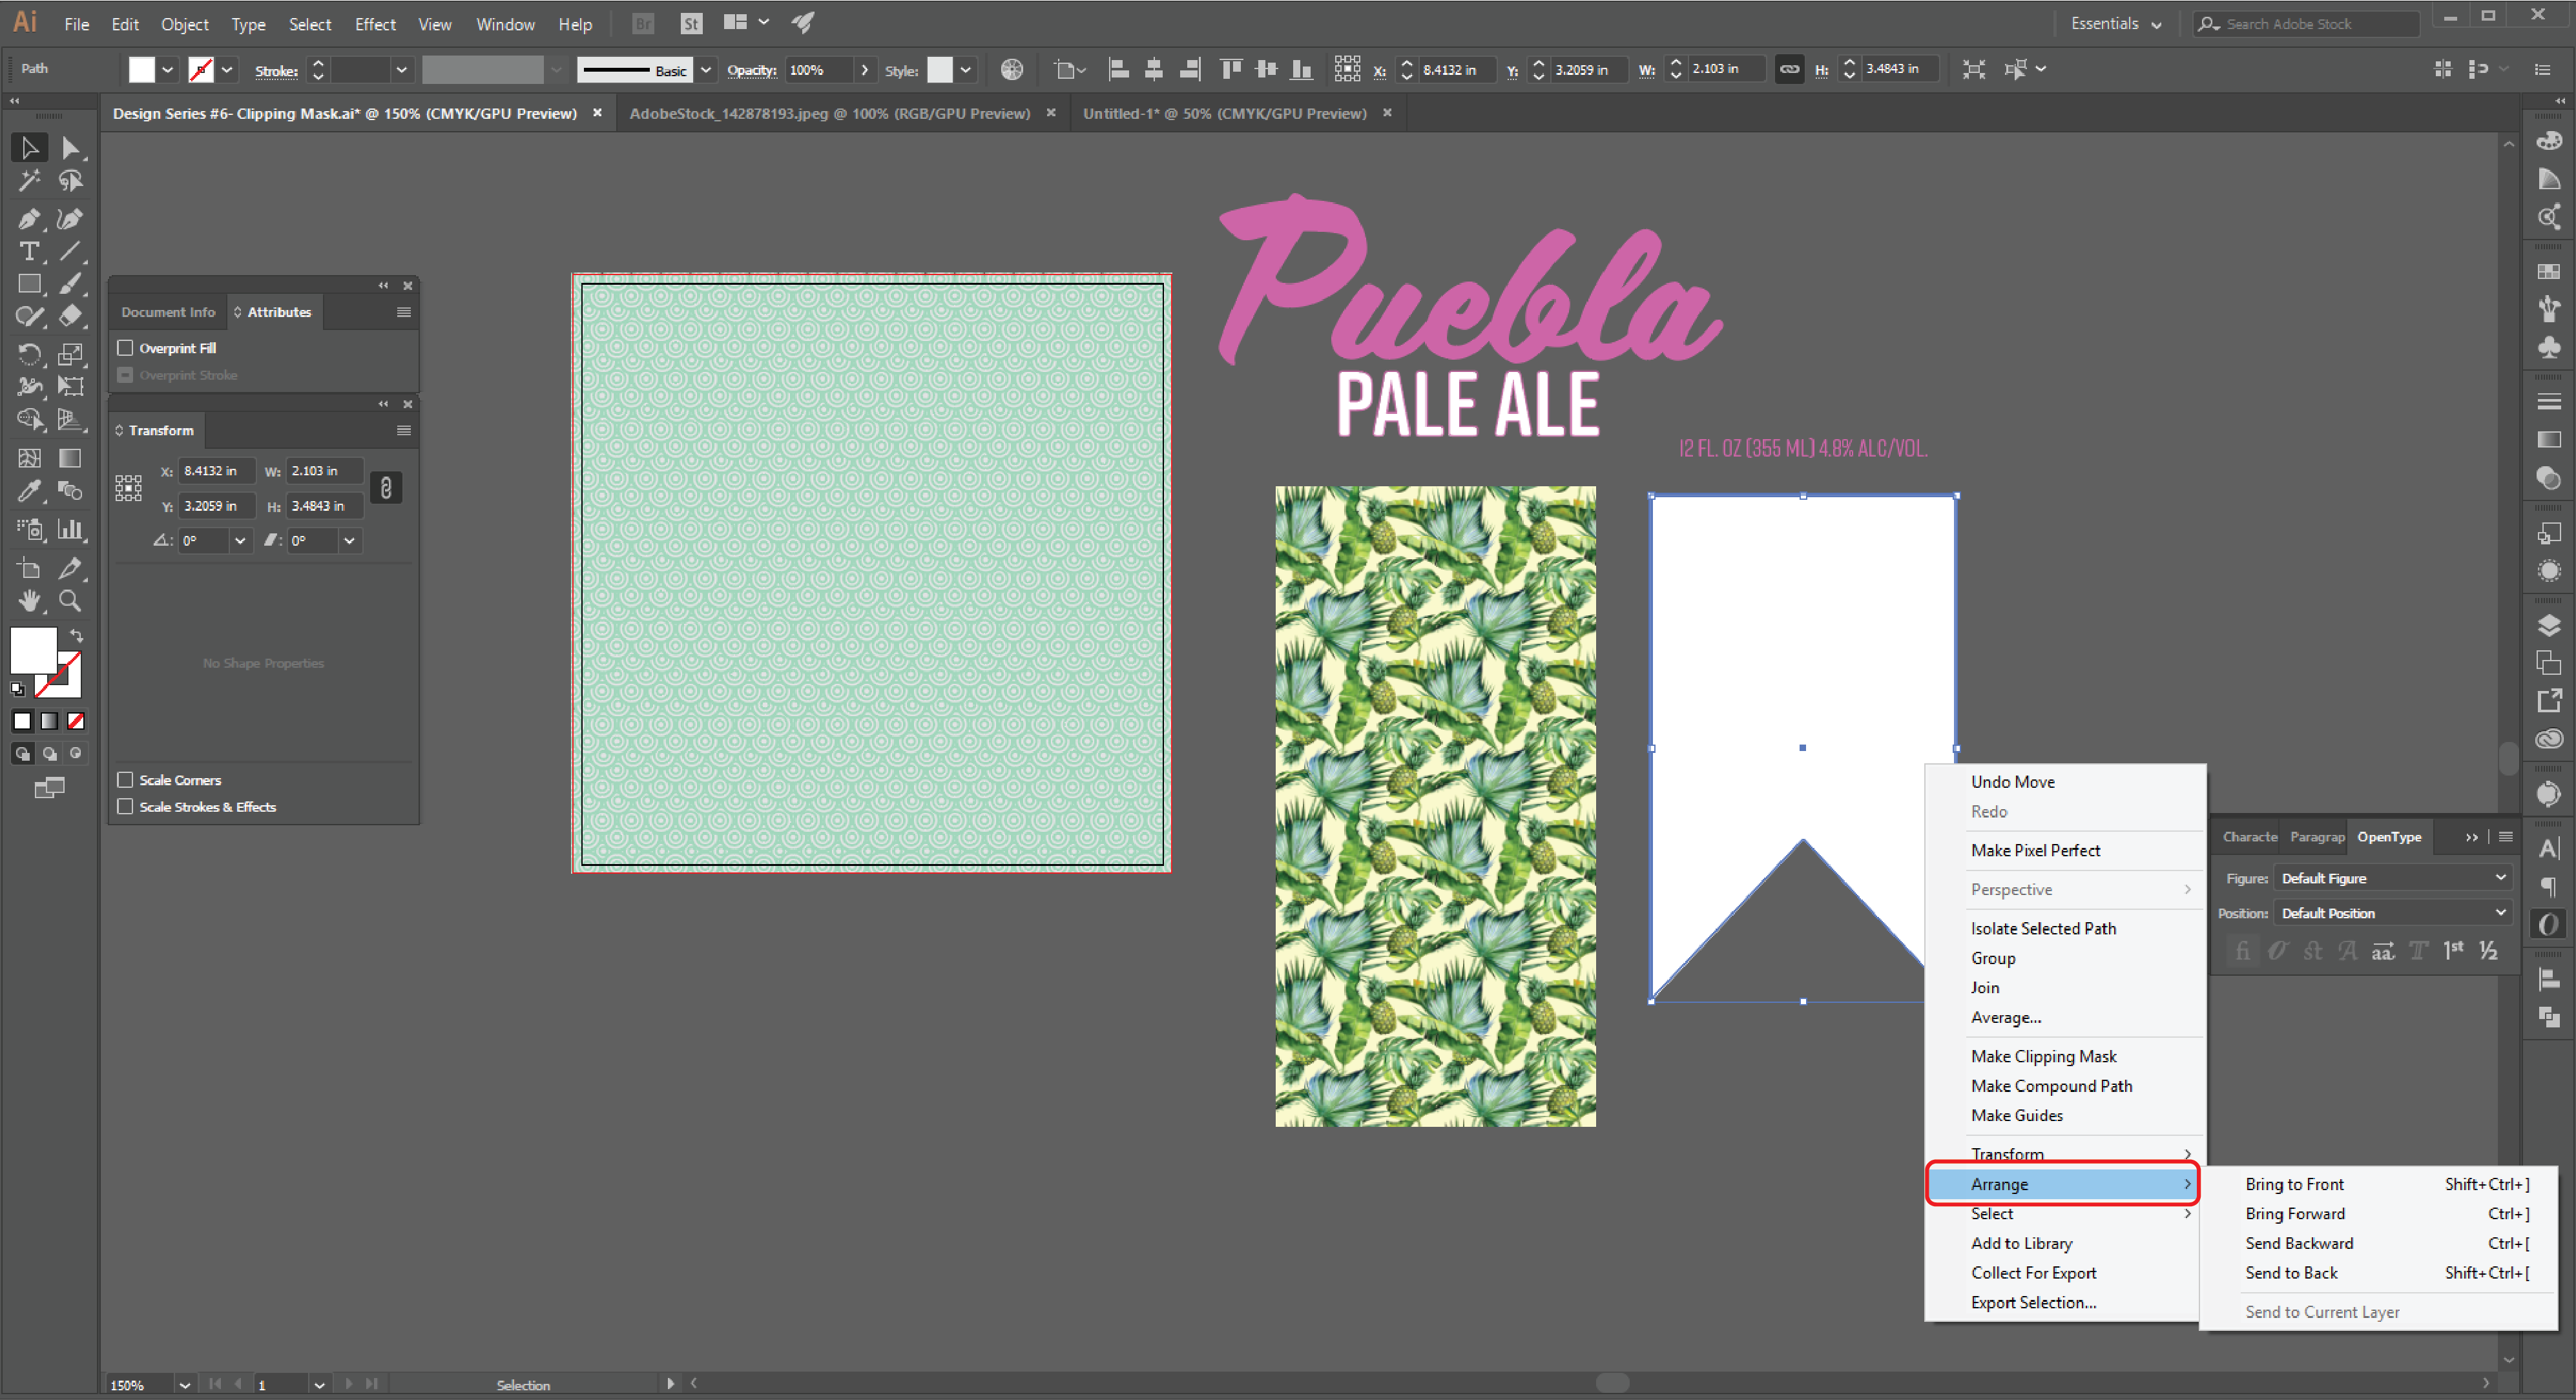
STEP 4: With your object still selected, right click on your shape and navigate to “Arrange”.

STEP 5: Within the “Arrange” sub navigation select “Bring to Front”. This is a very important step in setting up a clipping mask within Adobe Illustrator. The top most object in a clipping set will always be what the mask is created from. Now your object is the top most shape within that layer.

STEP 6: Next, we will select both the shape we want to use for the clipping mask, as well as the image or graphic we wish to include within the mask. For our example, we will be using this watercolor pattern we have repeated for the desired effect.
You can include multiple images/objects within a clipping mask. Our pattern we used for the background was created using a one singular circle, repeated multiple times, then clipping masked to fit the area of our label.
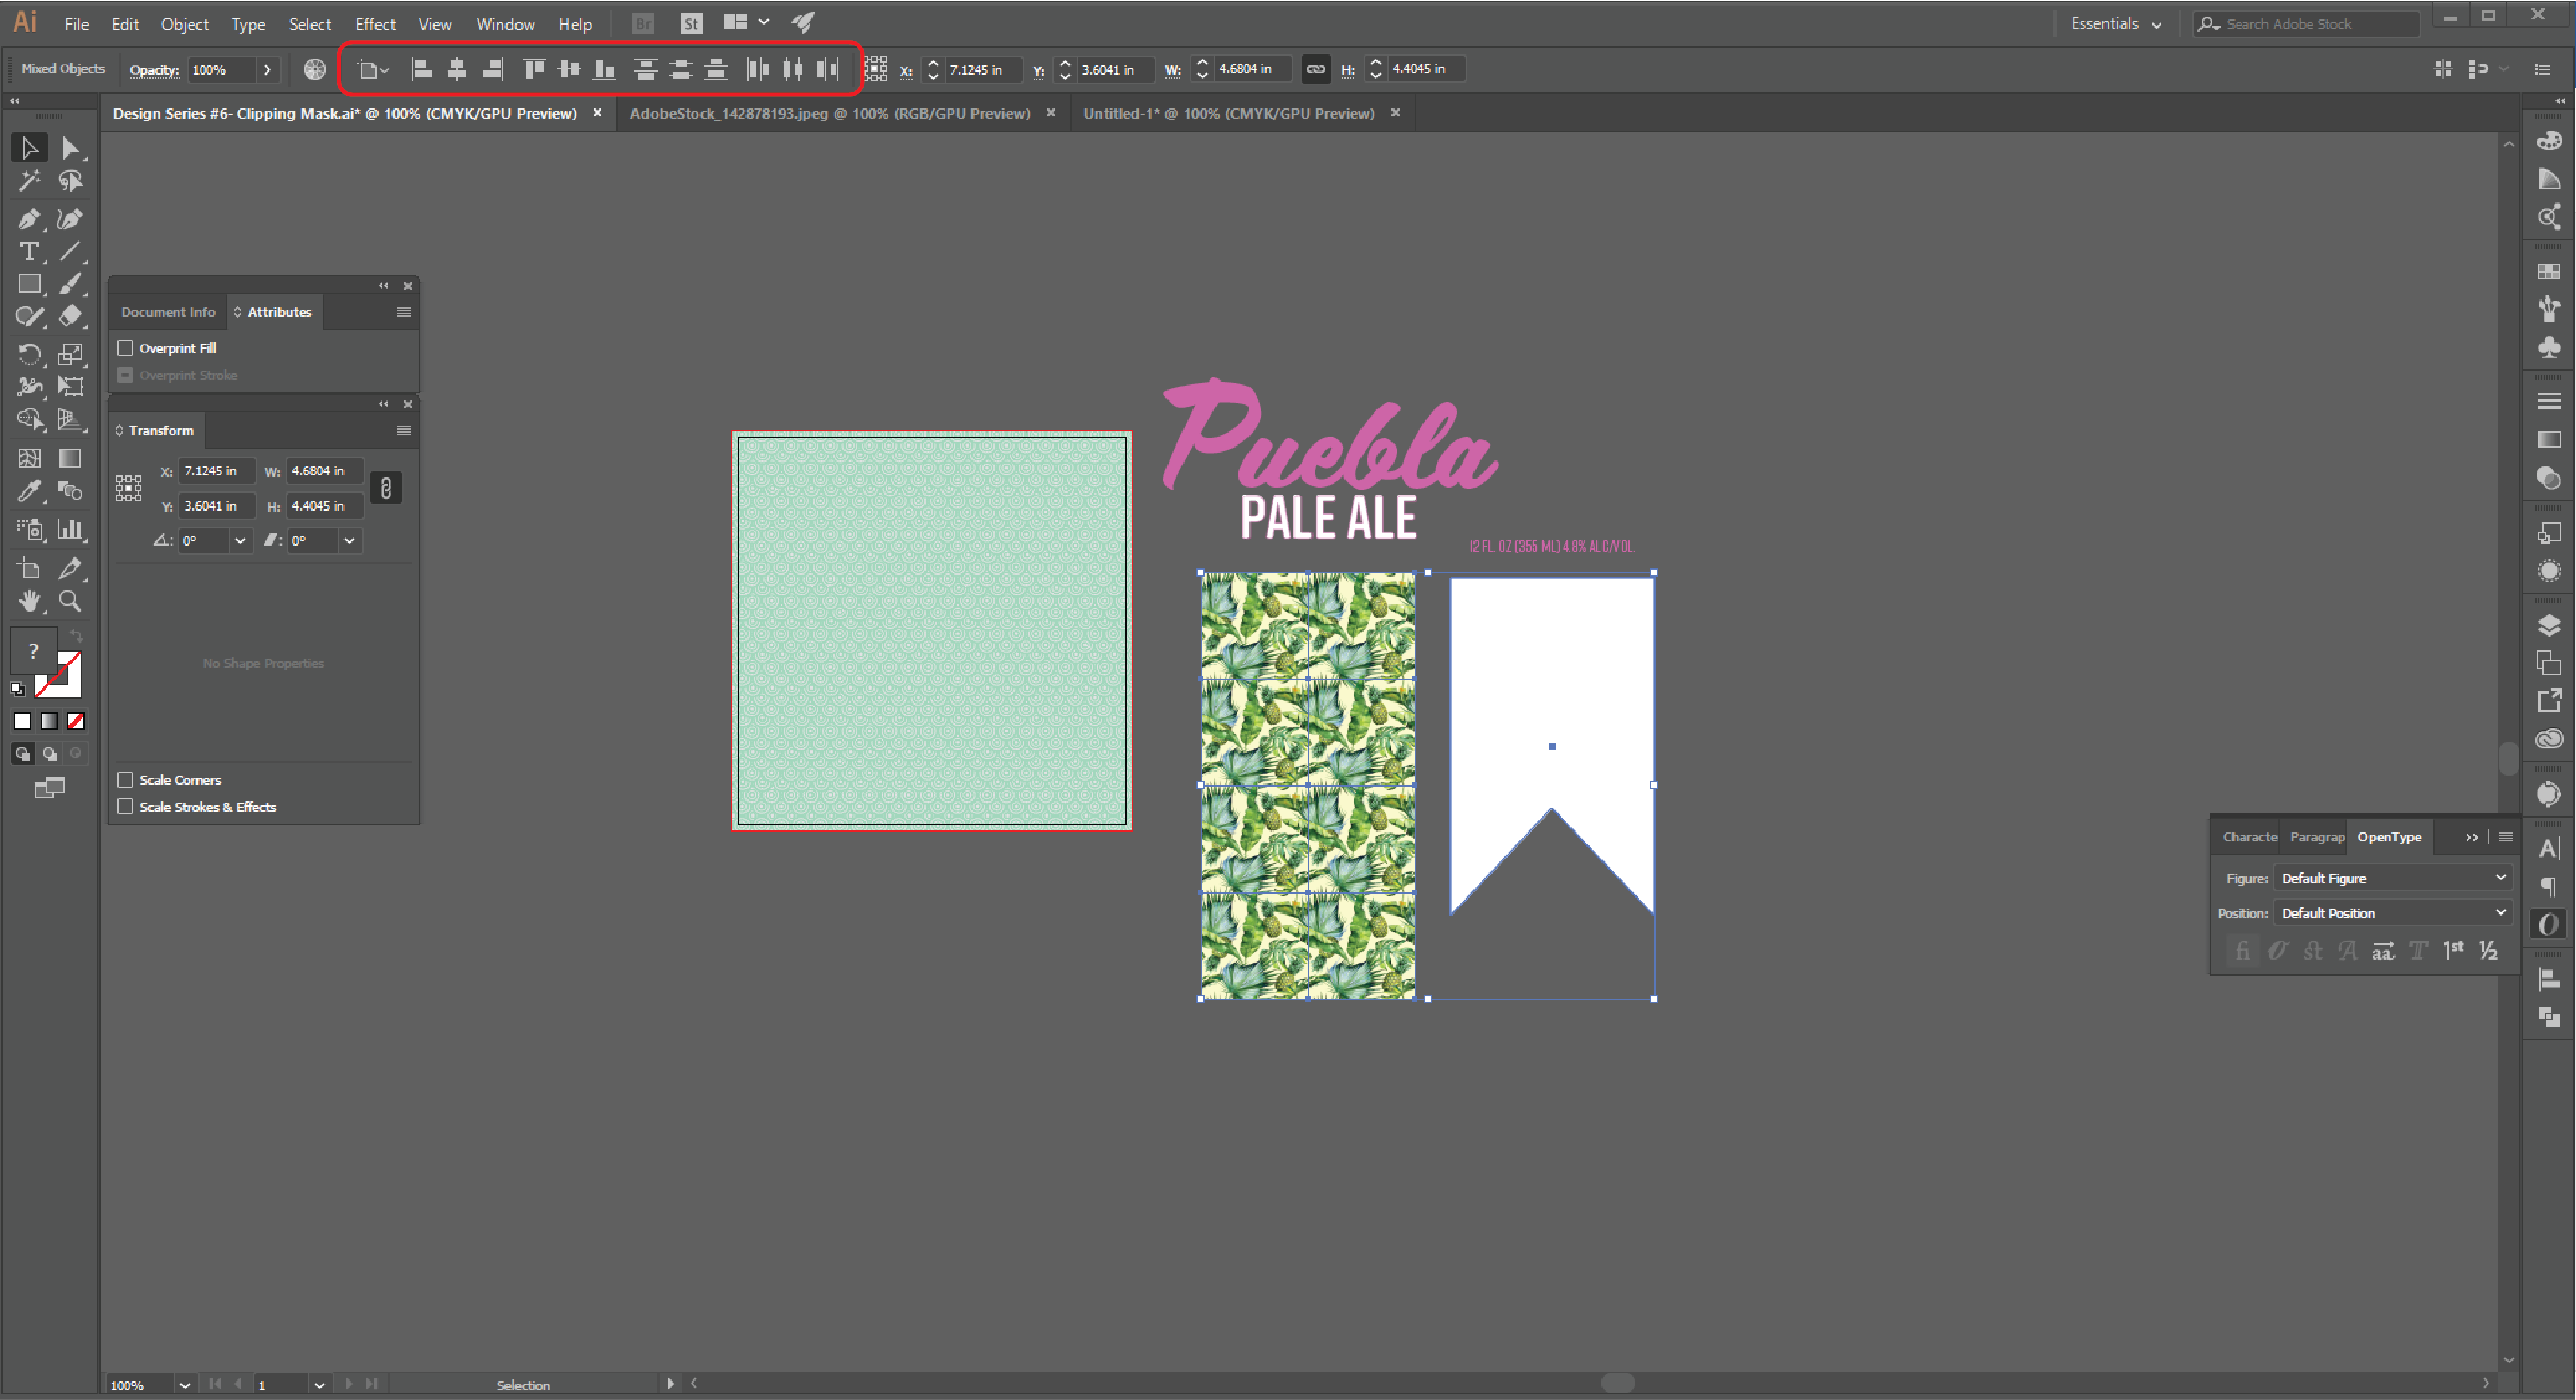
STEP 7: Now that we have both our clipping object and our artwork selected, we need to align them so when the clipping mask is applied we will see the artwork within it. The easiest way to do this is to use the "Align Tool". We just did a detailed tutorial on the Align Tool for Adobe Illustrator. Navigate to the align tool in your top menu in Adobe Illustrator.

STEP 8: We need to be sure that “Align to Selection” is selected. To do this, navigate to the align drop down menu and select “Align to Selection”.
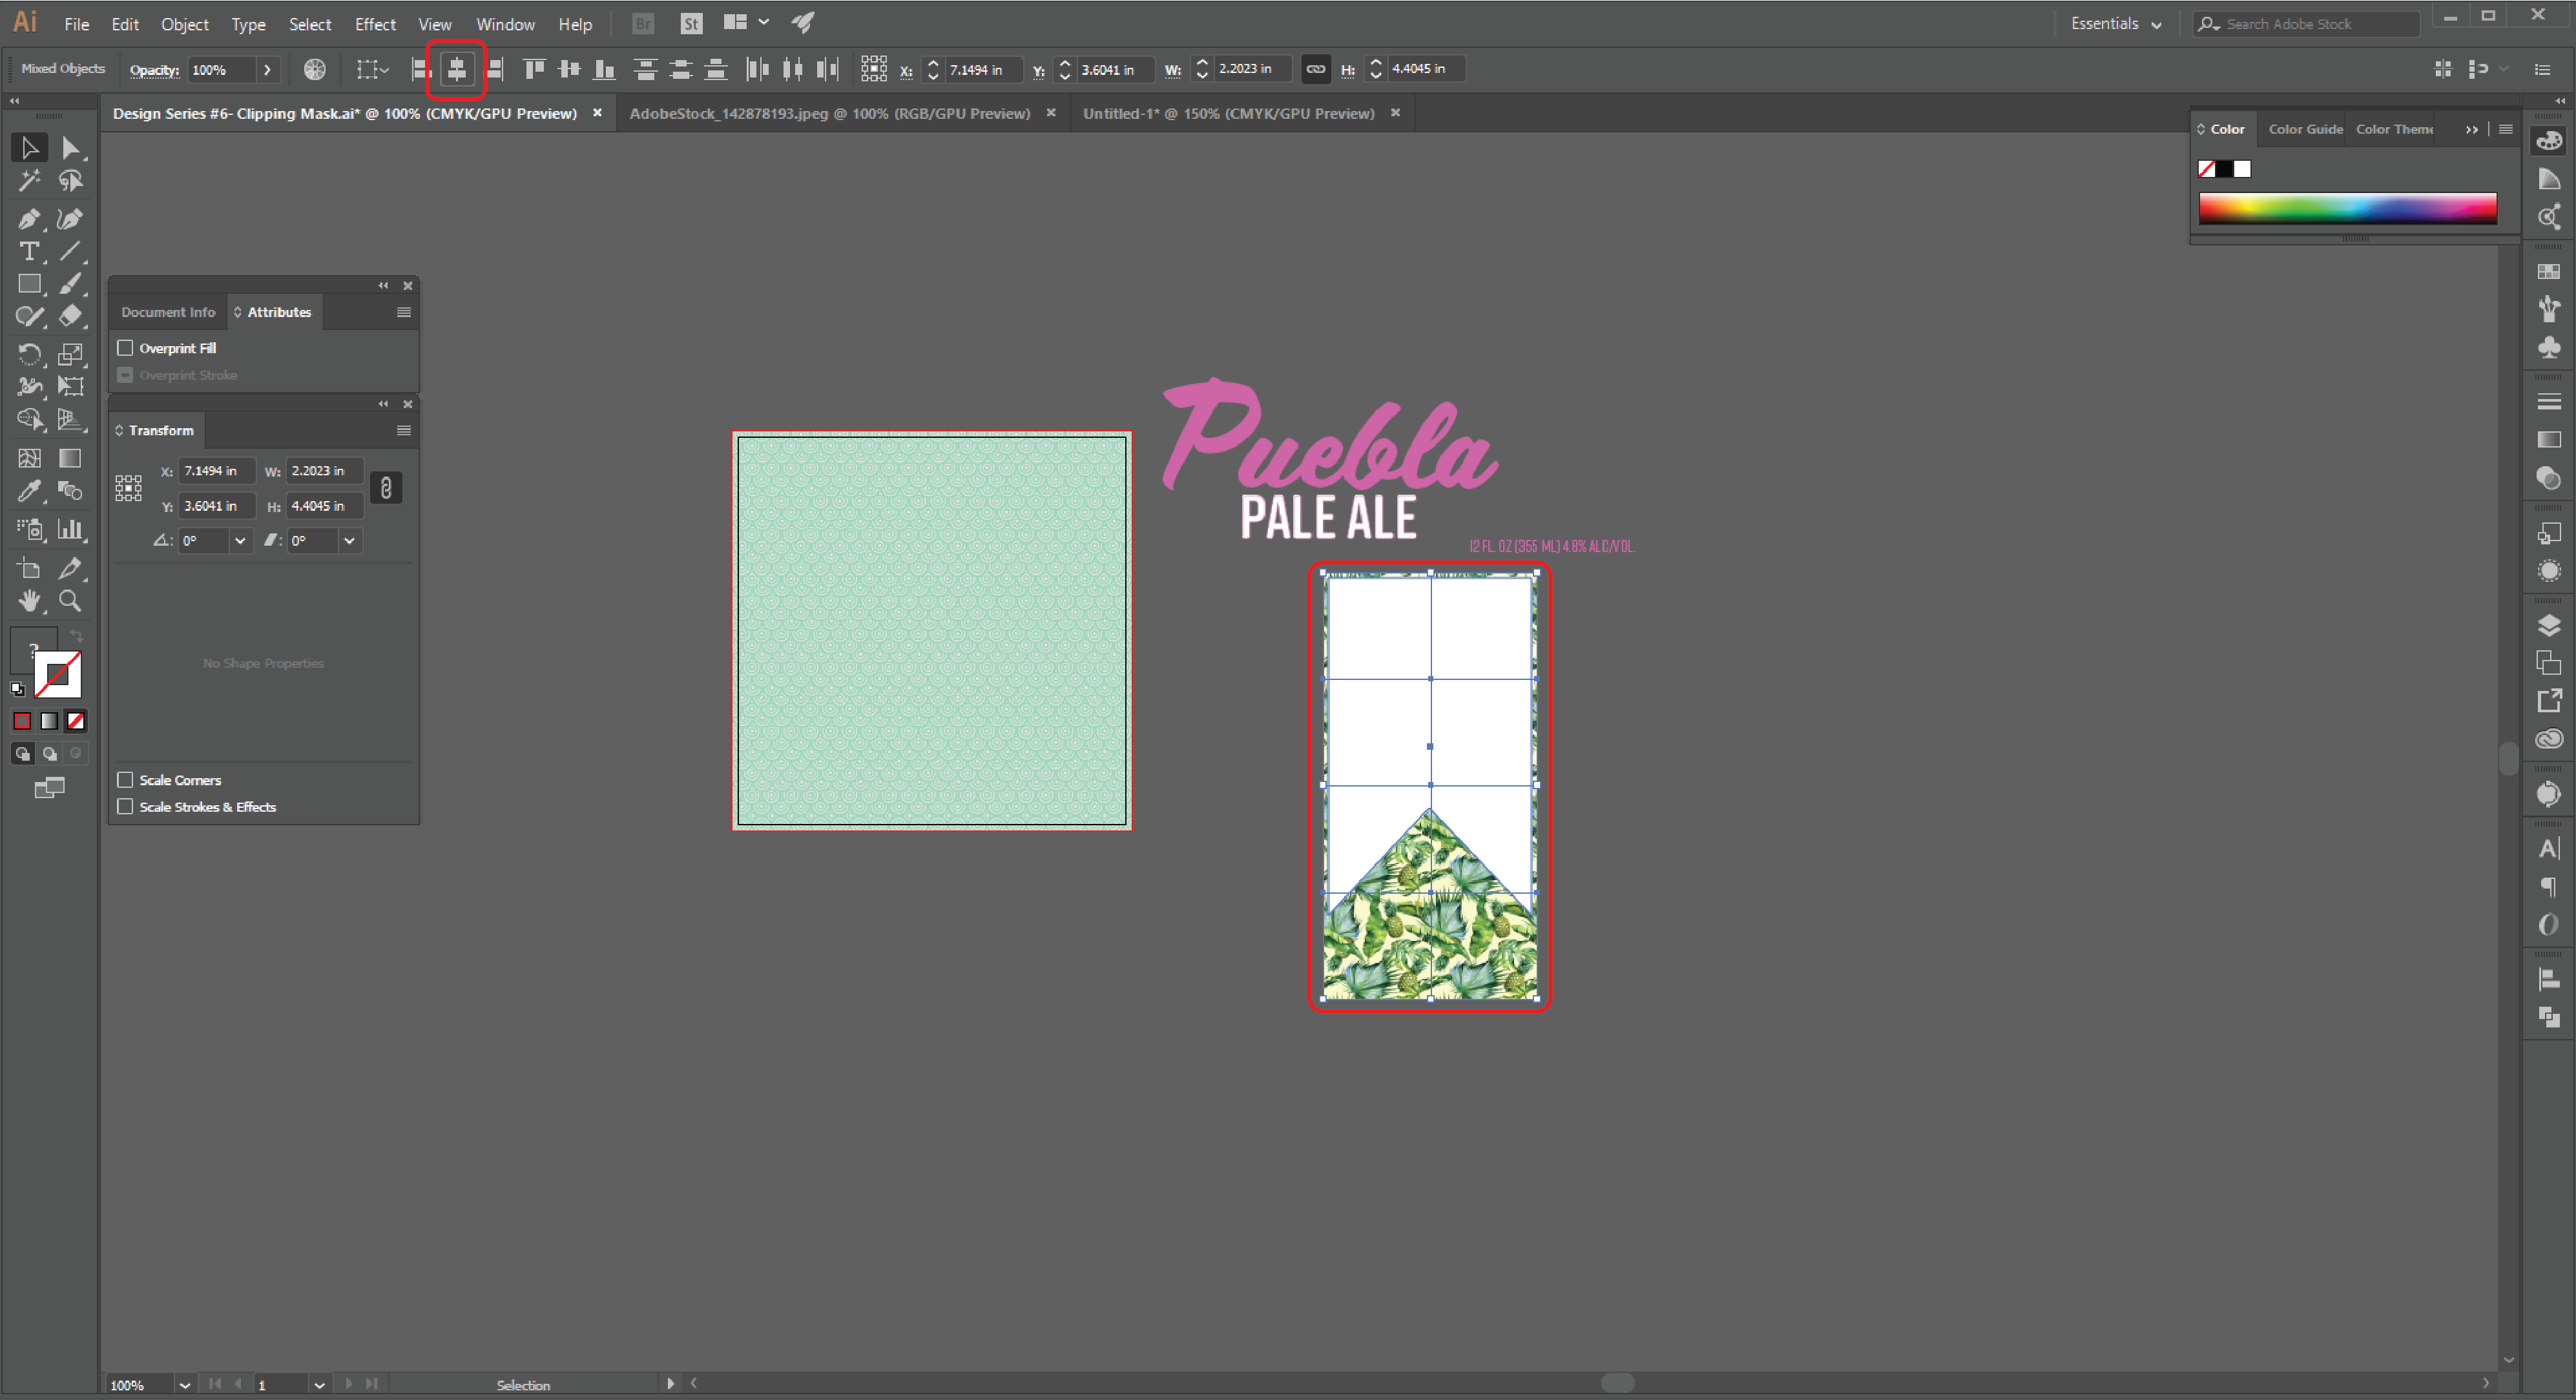
STEP 9: Making sure our mask object and our image are still selected, we will first press “Horizontal Align Center”. Your two selections will now align to their horizontal centers.
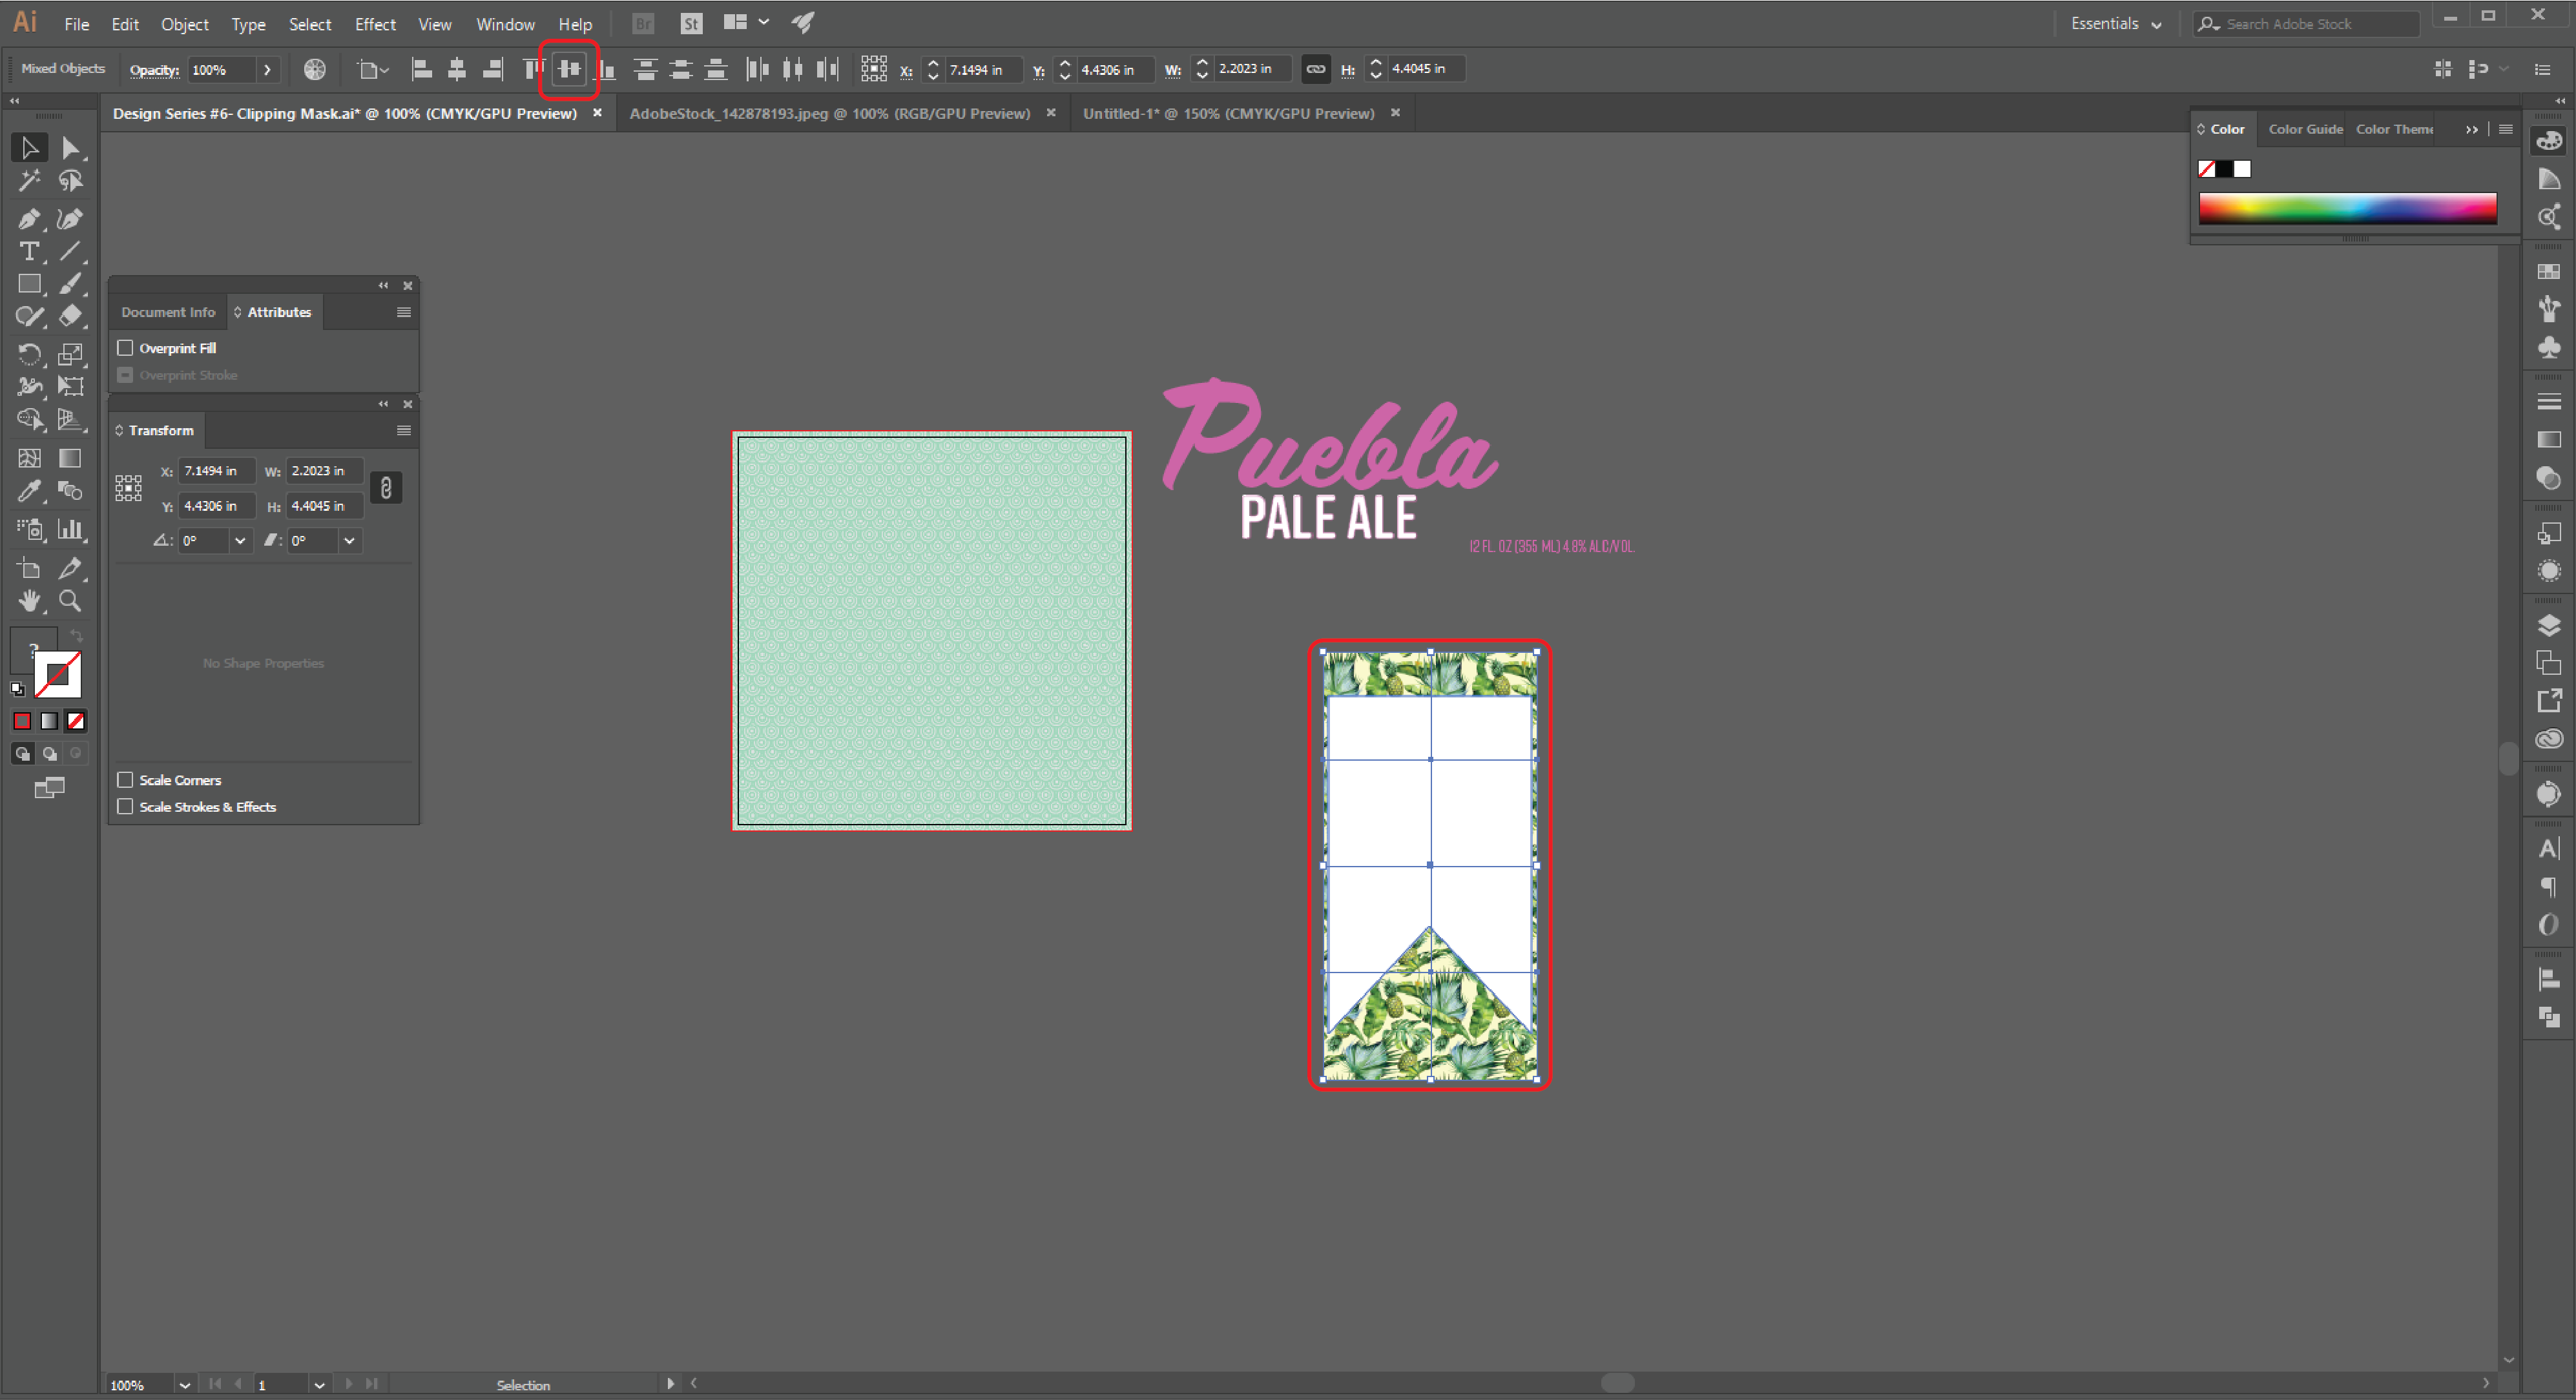
STEP 10: Next, we will use the “Vertical Align Center” option to completely center our artwork. To do this, navigate again to the align toolbar. With your two objects still selected, press “Vertical Align Center” as show in the image above.
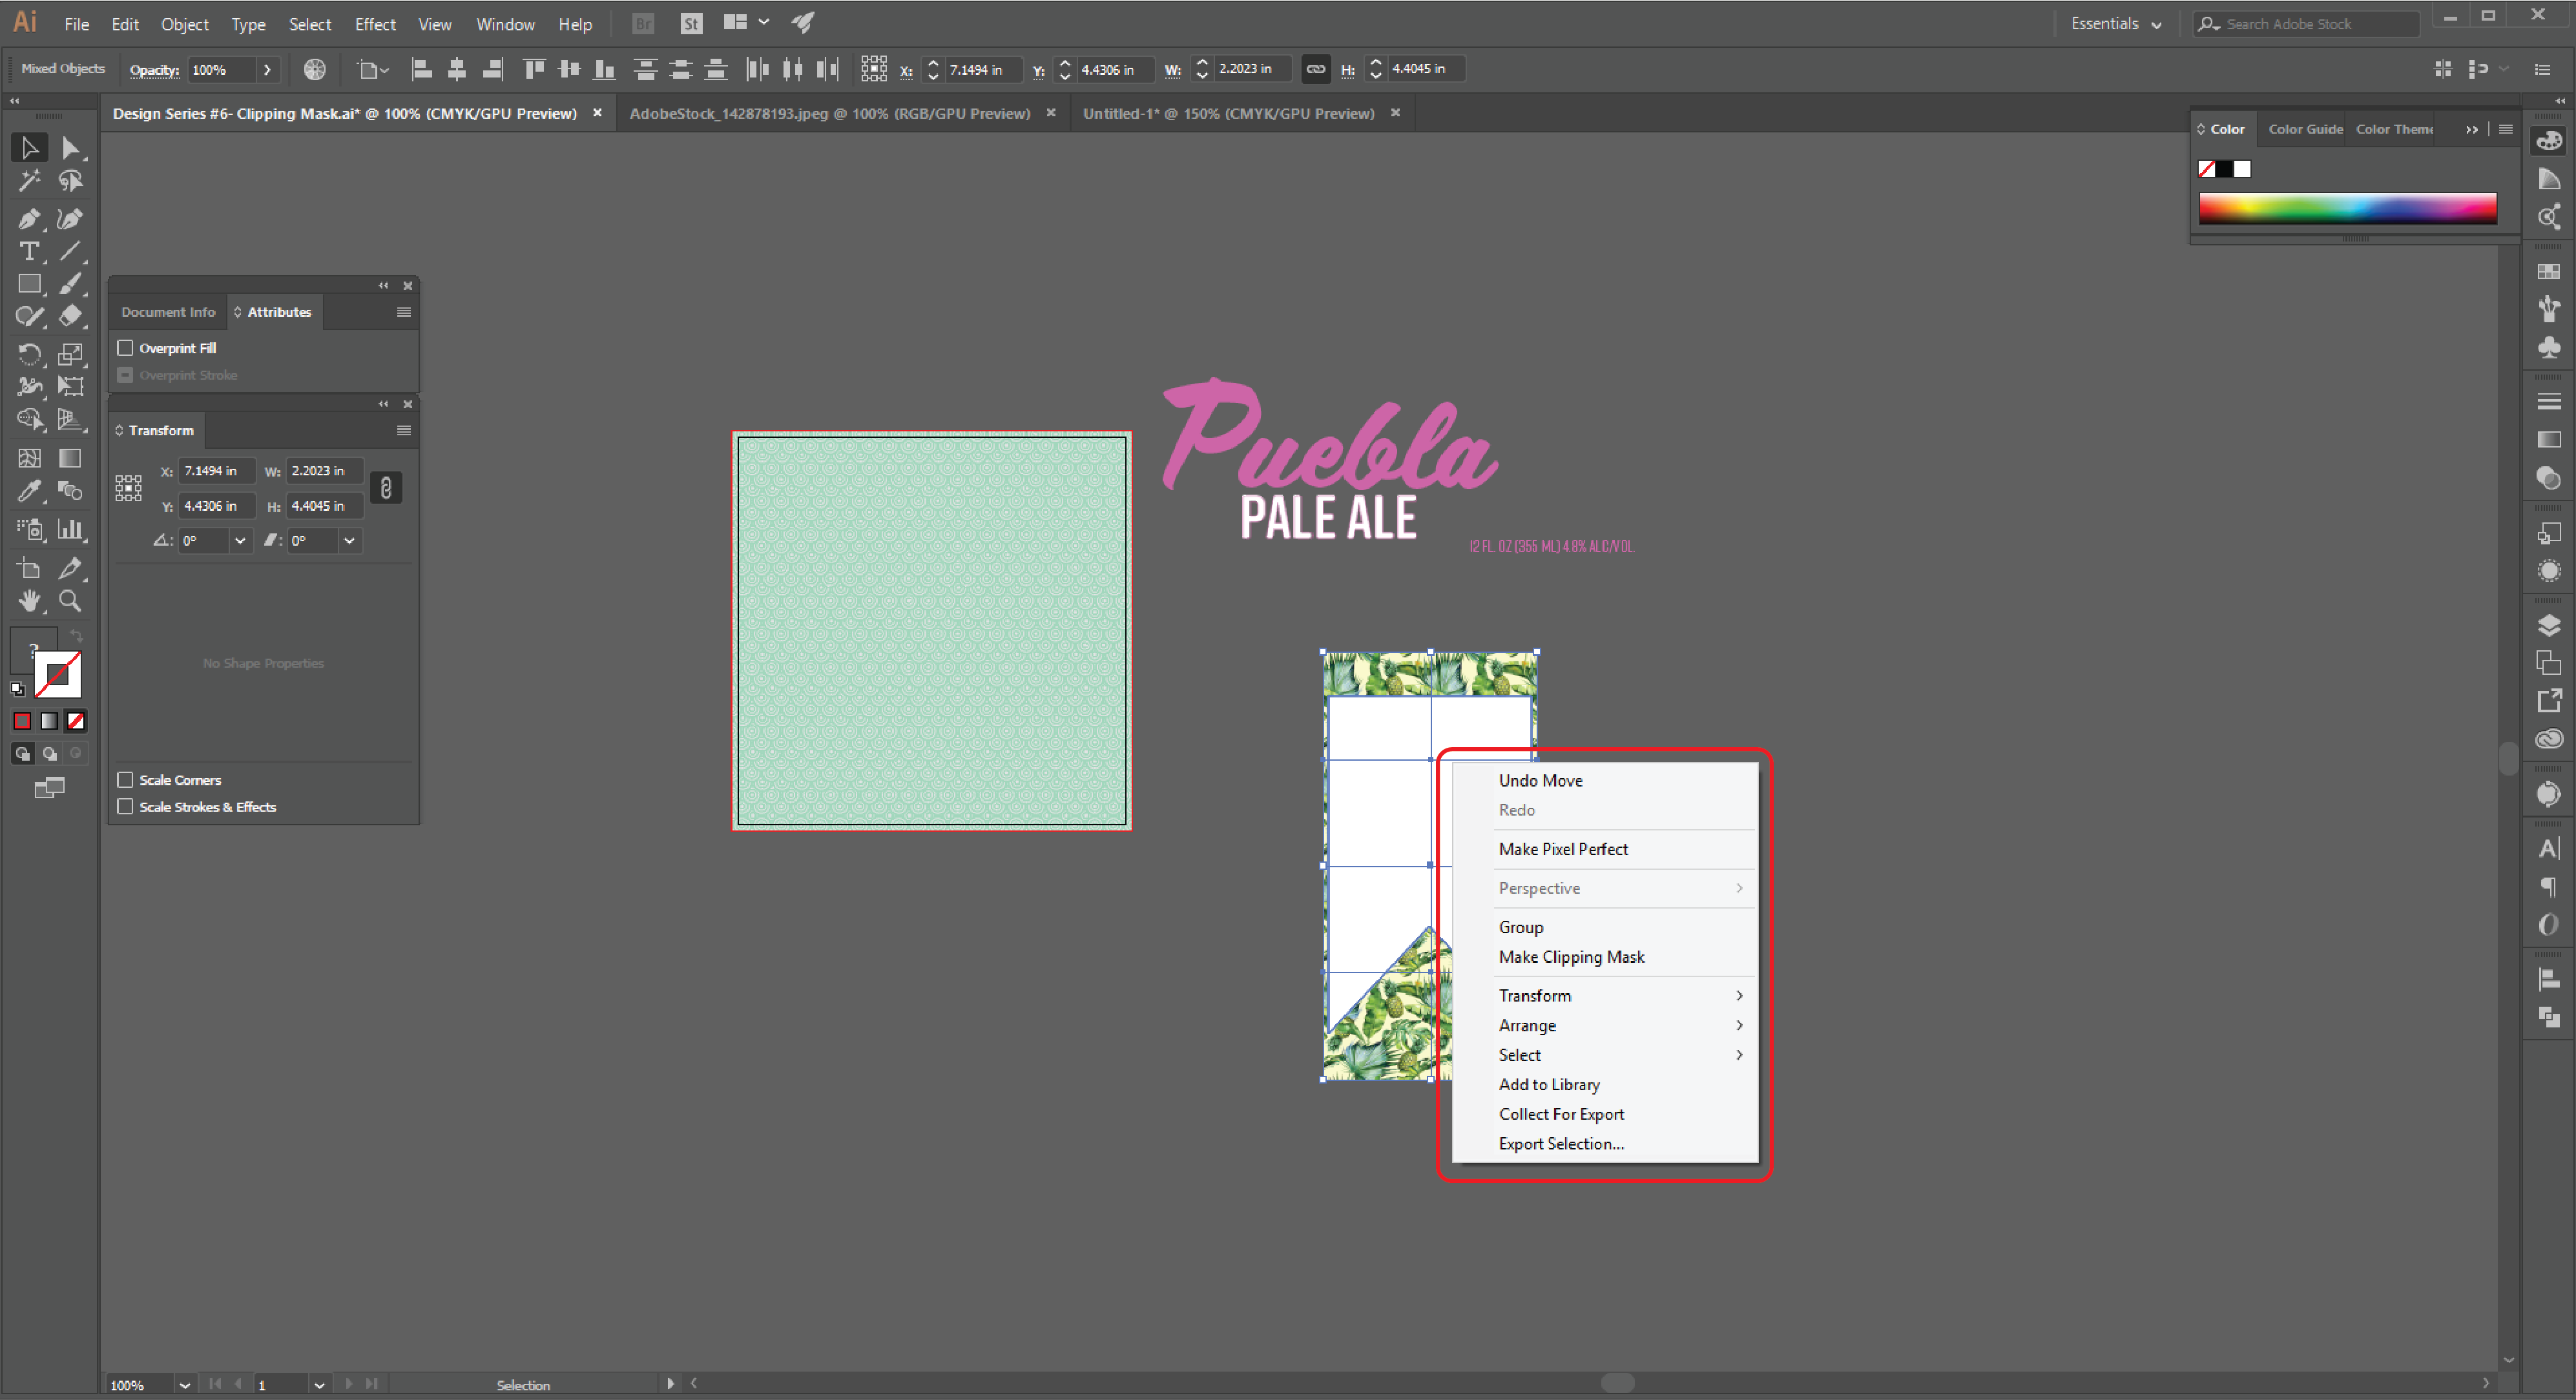
STEP 11: Now that we are aligned correctly, we can proceed with the clipping mask. Make sure your object and image are both selected, and right click.

STEP 12: Navigate to “Clipping Mask” in the menu and select it.

STEP 13: Your object will now be transformed into a clipping mask to the object(s) that were placed underneath of it.

STEP 14: If you want to edit the placement of your masked image, Illustrator makes it very easy to do so. Simply double click the image and you will automatically enter Isolation Mode. This allows you to adjust or edit the placement of objects that are placed within a mask or a group. When finished editing simply double click outside of your selection to leave isolation mode.
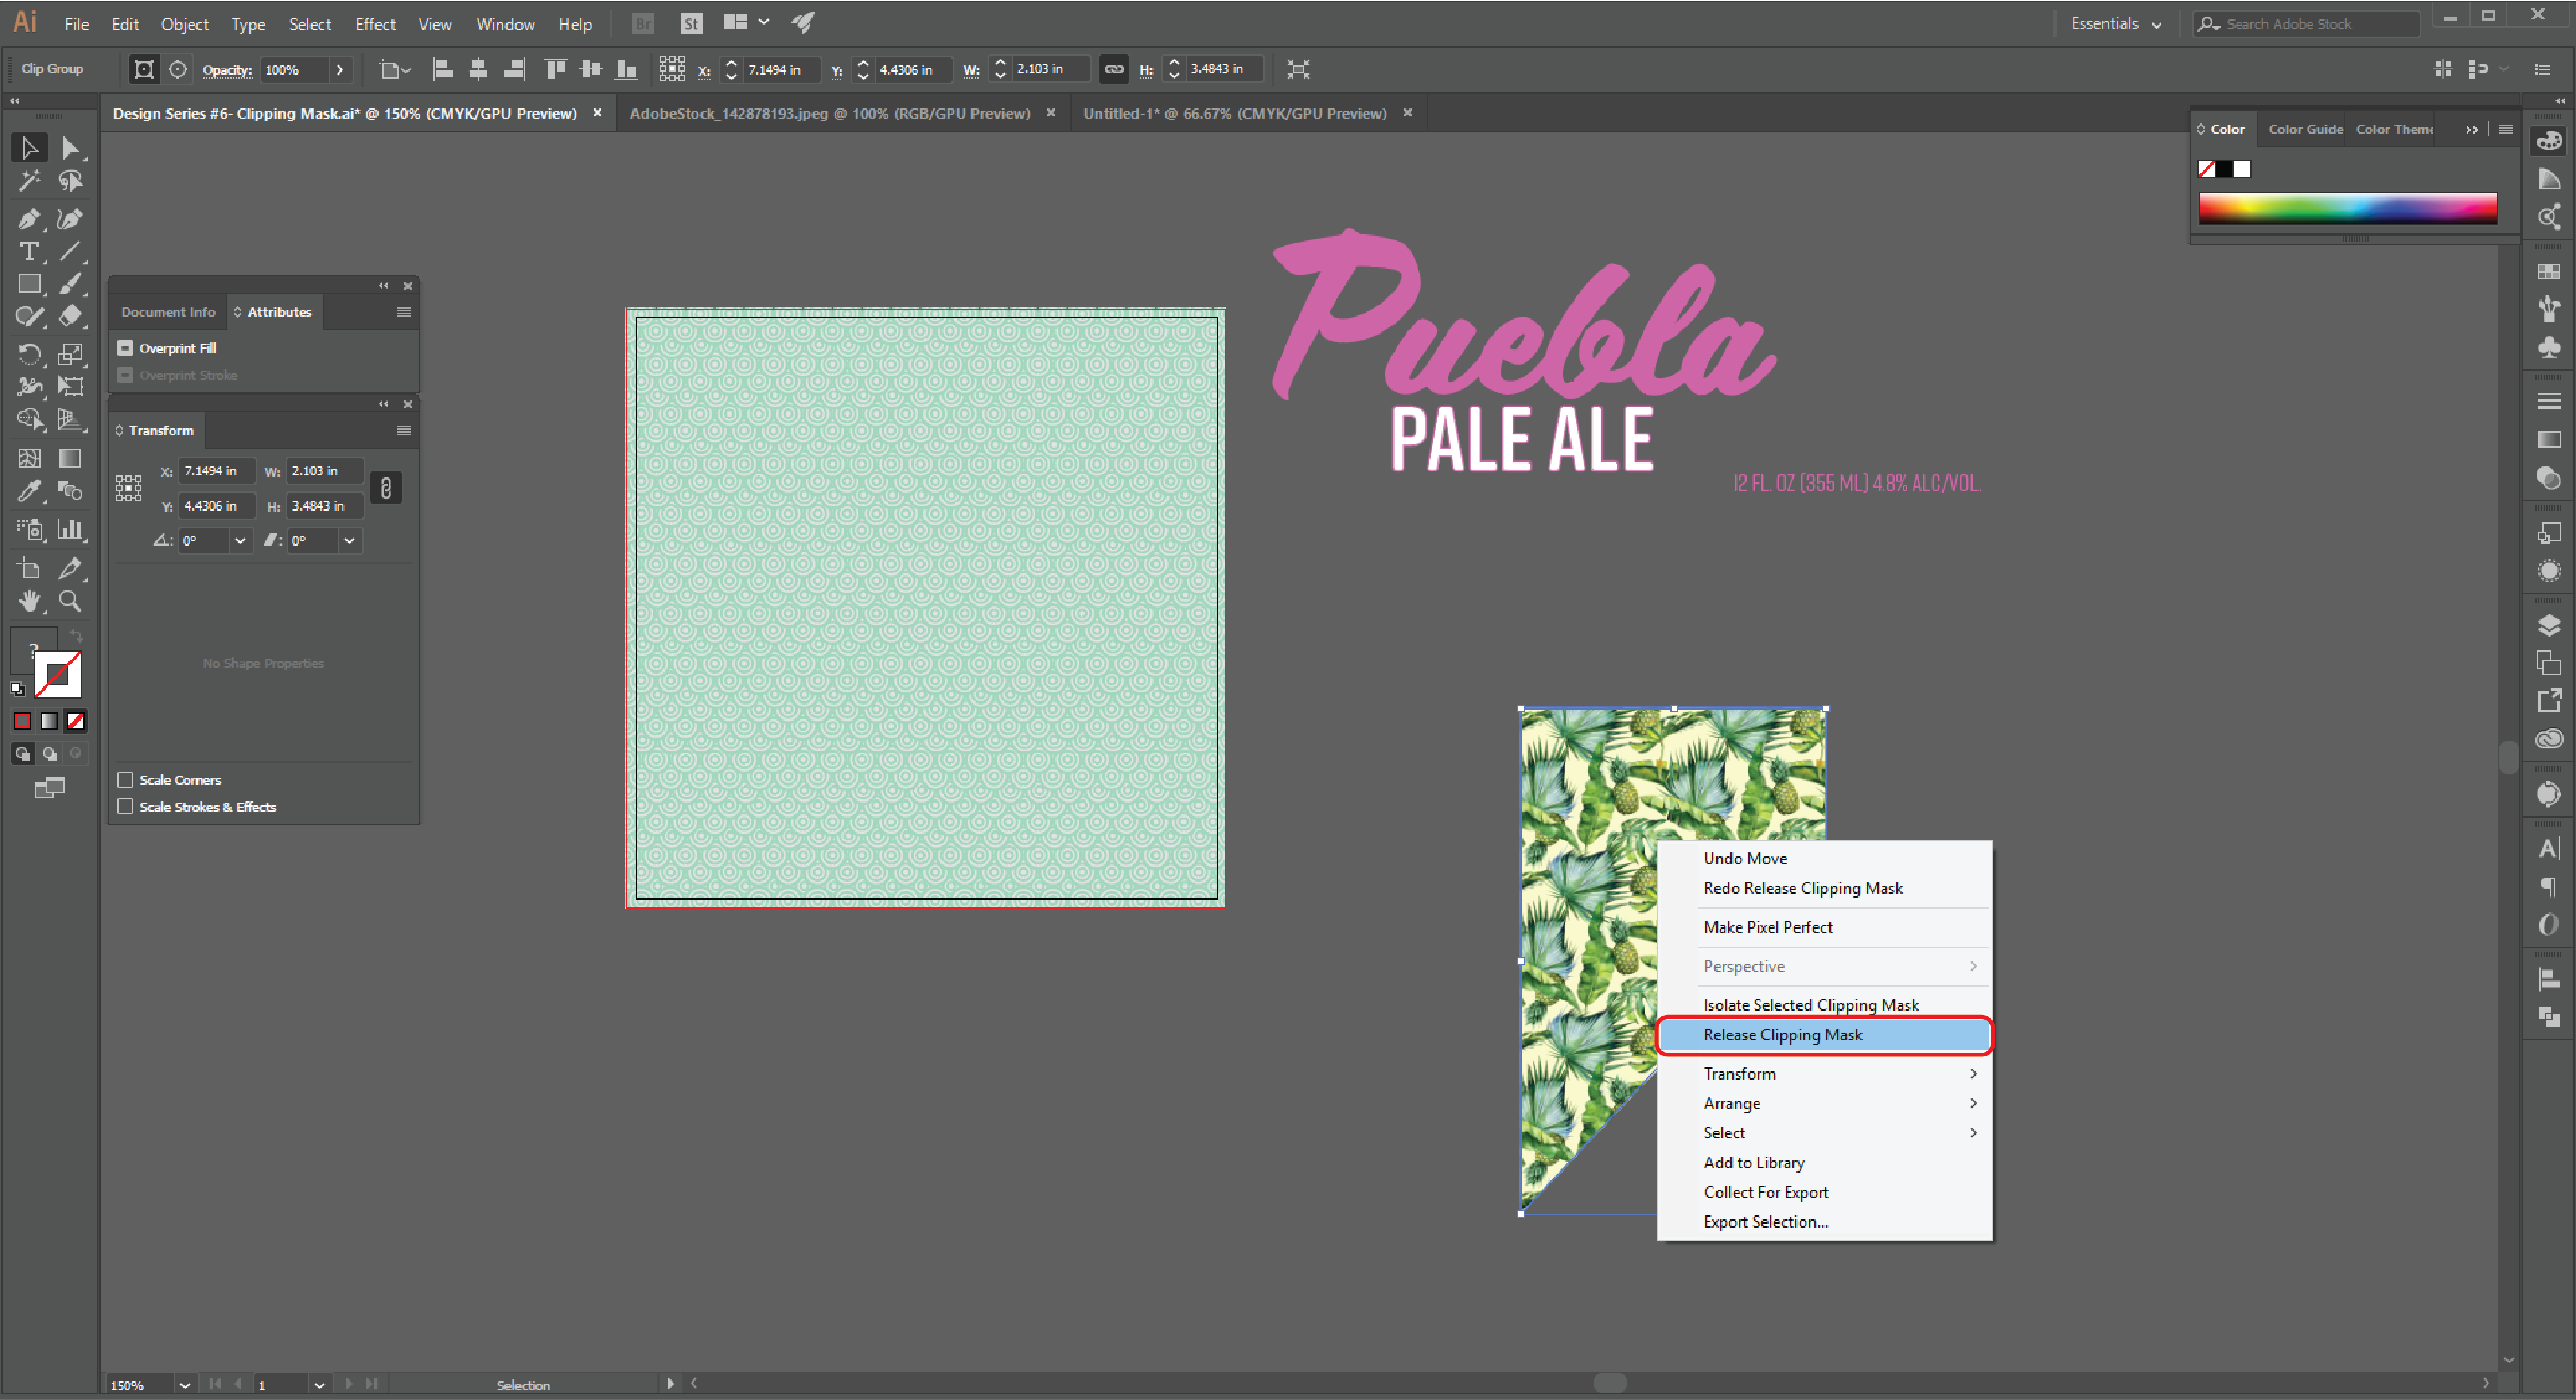
STEP 15: It’s just as easy to release a clipping mask as it is to create one. To do so, select your mask, right click, and select “Release Clipping Mask”. This will separate your mask object and the artwork that was being masked.

STEP 16: It is important to note that your mask will still be an object when you release a clipping mask, however it will not have a stroke or a fill. See an example of this above.

STEP 17: With your clipping mask completed you are free to move it around your design and use it as necessary. Here is our final design with our clipping mask being used.
Have a question related to your artwork or clipping masks? Send us an email with your question to service@labelvalue.com with "Graphic Design Question" in the subject.
Turn your designs into eye-catching labels or stickers today!
Shop Custom Labels